


Home > MacX Video Converter Pro > User Guide
MacX Video Converter Pro is a full-featured video converter which is capable of converting variety of HD videos and SD videos for playback on Mac OS computer. It will help you convert HD MKV, AVCHD, M2TS to iPhone, iPad, iTunes, iPod, Apple TV, PSP, PS3, Android, Zen, etc. It owns full compatibility with most Mac popular video formats MKV, M2TS, AVCHD, MOV, MPEG, FLV, MP4, H.264, AVI, WMV, WTV, Google TV, Webm, Vpx 8. Moreover, MacX Video Converter Pro provides users flexible options to control output quality, size and speed by adjusting video/audio parameters, etc.
How to convert video files using MacX Video Converter Pro? The following will show you a step-by-step guide to complete conversion tasks. First, download and install MacX Video Converter Pro.
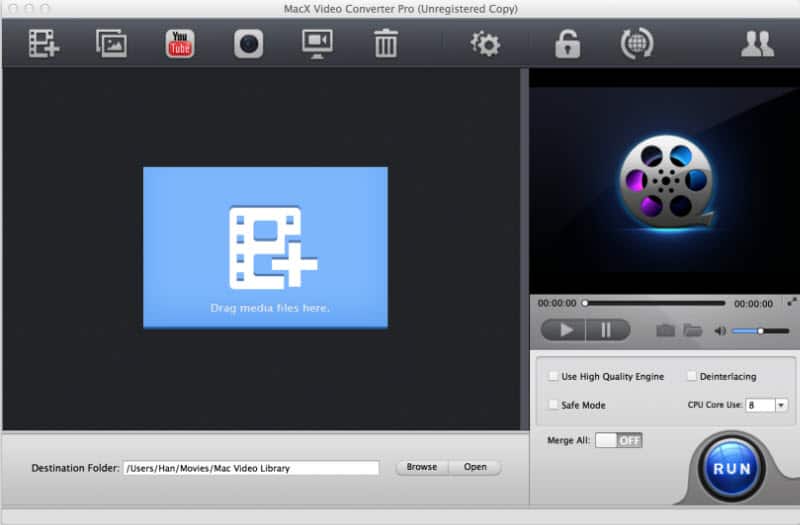
Step 1: Load Video File(s). Run MacX Video Converter Pro and import source video by clicking "Add videos" button. You can add more than one video files at one time.
Step 2: Choose the output video/audio format. Click the file in the preview window and select the output video or audio format from the drop-down list.
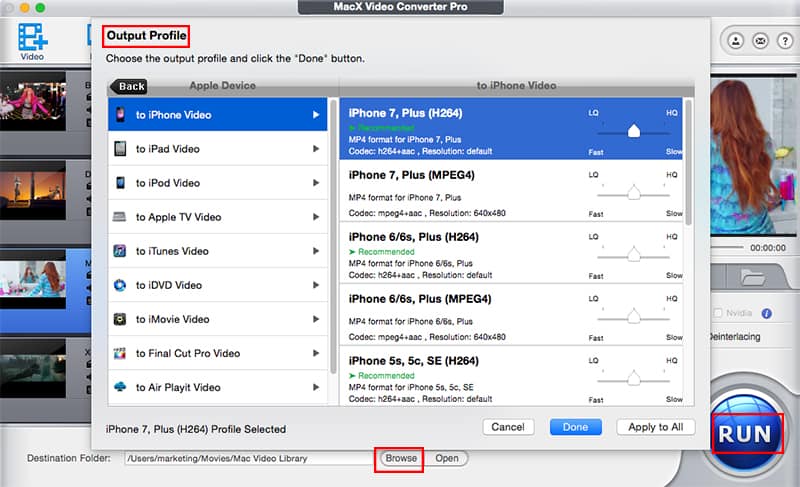
Step 3: Select Output Folder. Click the "Browse" button to choose the path where you want to save the output file in.
Tips:
1. Flexible parameter settings allows you to adjust frame rate, resolution, bite rate, audio channel, etc according to your advanced need.
2. To improve the output video quality, you can select "High Quality Engine". If your original video is interleaving video, select "Deinterlacing" and the Advanced De-interlace Accelerator can convert it to progressive scanning video with much clearer image.
3. You can also set the CPU core use to enhance the conversion speed. When you encounter problem during the conversion, select safe mode to have a try.
Step 4: Start Conversion. With the above steps done, please click the "RUN" button to start conversion, you could view the conversion progress and are able to cancel the converting process at anytime.
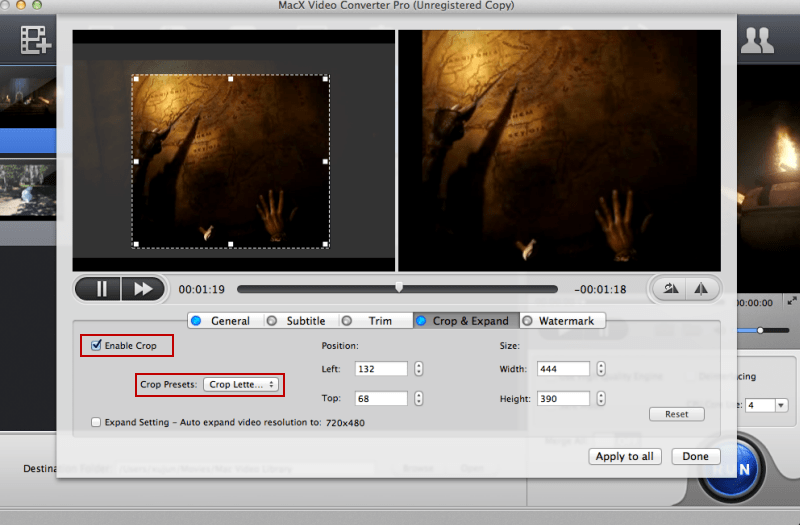
Select "Edit" tab of the video need to convert, click "Enable Crop" button and adjust your video's aspect ratio to Full Screen, 16:9, 4:3, 1:1, or you can adjust the crop area size and position by dragging the resizable handle and frame. Once you finish your setting, press "Done" to confirm.
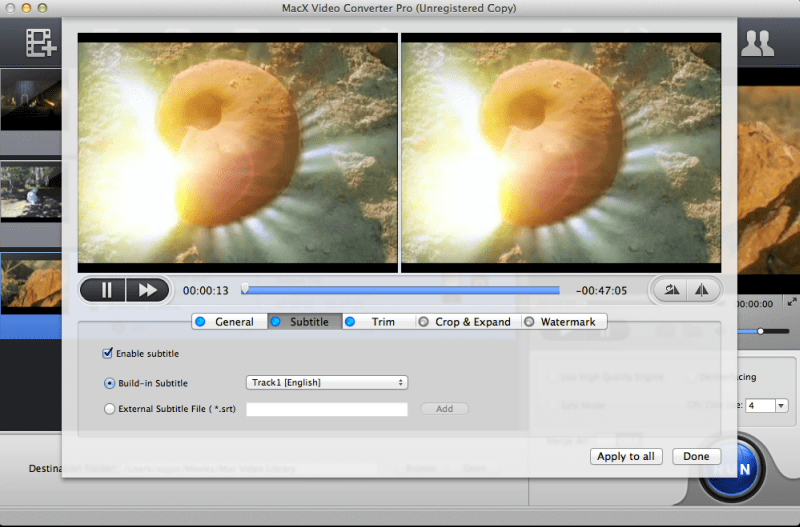
Select "Edit" tab of the video need to convert, click "Enable subtitle" button to add built-in subtitle tracks to the video or you can load an external subtitle file (.ssa, .ass, .srt) to the video. If you don't have a subtitle file yet, go to opensubtitles.org to search and download one for free.
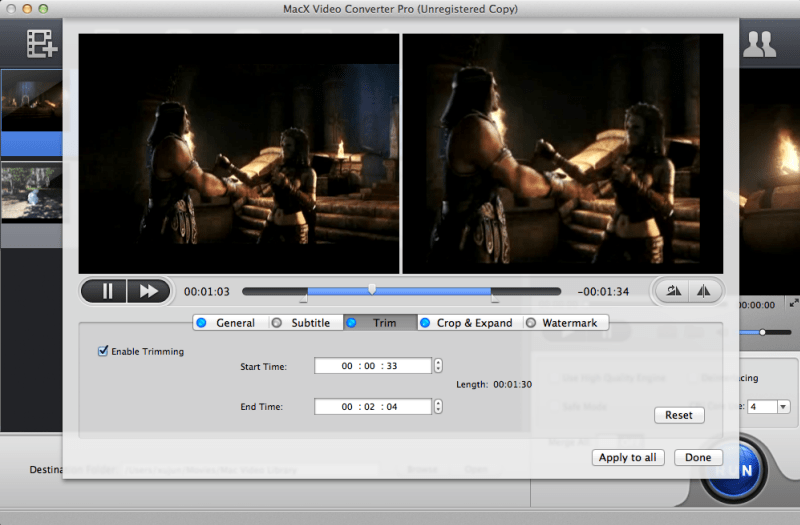
Select "Edit" button, the submenu Trim window allows you to adjust the duration of the video segment by dragging the left or right bar under the video preview windows or modify the "Start Time" and "End time" with values directly.
Under "Watermark" tab, tick the option of "Enable Watermark" to import an image watermark or create a text watermark to personalize your video. Also adjust the transparency, vertical and horizontal position of your watermark.

To merge two or more files, select the videos you want to merge, choose the status Merge All ''On'' for merge and click ''Run'' in the main interface.

MacX Video Converter Pro enables you to convert a series of pictures into a stunning video as FLV, MOV, MP4 file, etc. The following will show you a step-by-step guide to complete conversion task.
Step 1: Import the pictures folder. Firstly, you should put all the pictures you want in a folder in desired order. Then click "add photos" button and select the entire folder for making the slideshow.
(There are multiple options given in the program, such as, you can rename the output file name as well, add or delete images, set the order of appearance according to photo location, creation date or file name.)
Step 2: Adding background music. Click "Add Music" button to add the audio tracks from the list to the video as background music.
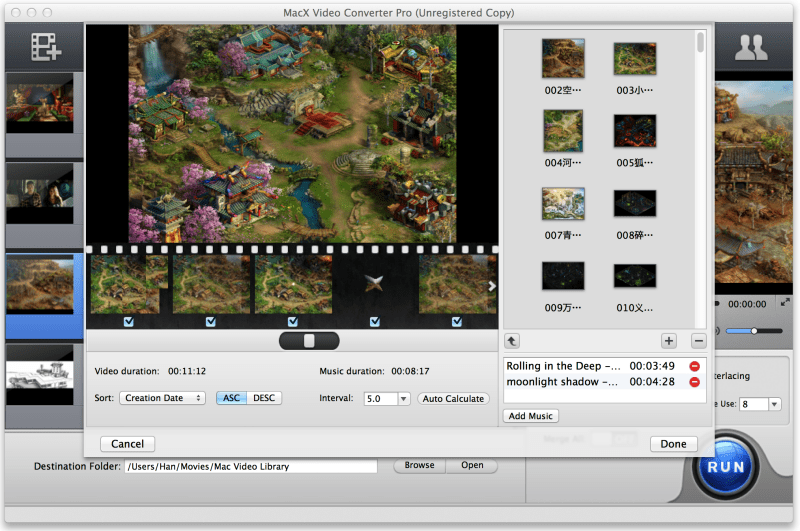
Step 3: Choose output format. Choose the output format in the drop-down list and click the "Done" button. Use the "Browse" button to specify destination folder for saving output files, then click "RUN" to start conversion.
To download YouTube video on Mac, go and hit the "YouTube" button on the main interface of MacX Video Converter Pro, the built-in YouTube Downloader window will pop up automatically as follows.
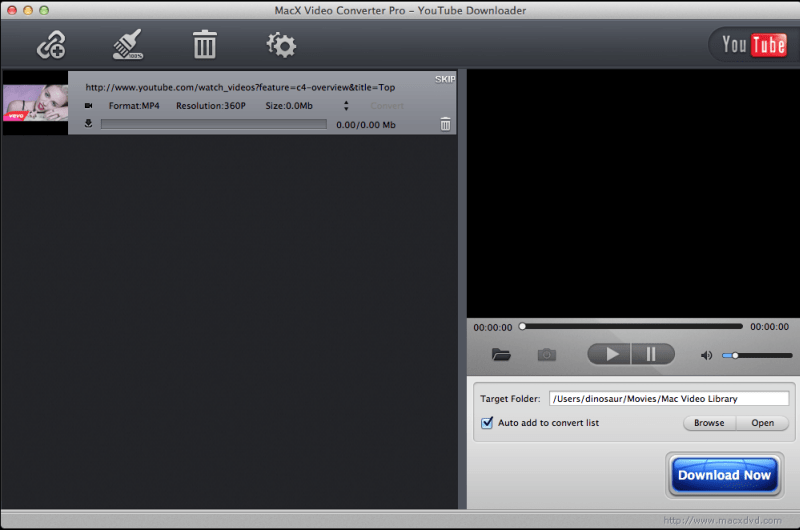
Step 1: When you find a video you'd like to download, copy the target online video address, paste it to the address bar and click "analyze" to load the YouTube video details in the program. Alternatively, you can click "paste & analyze" button to automatically detect the YouTube video opened in browse.
Step 2: Click "Browse" button to specify an output folder on your computer to save the output files.
Step 3: Hit "Download Now" to start the download.
Tips: To convert YouTube video to more output formats and devices for offline viewing, you can hit "Auto add to convert list" for further YouTube video conversion with MacX Video Converter Pro. After finishing YouTube downloading, the downloaded video will be automatically added to the conversion list.
The "Video recorder" feature lets you freely create video clip with Mac's built-in camera (or external connected camera).
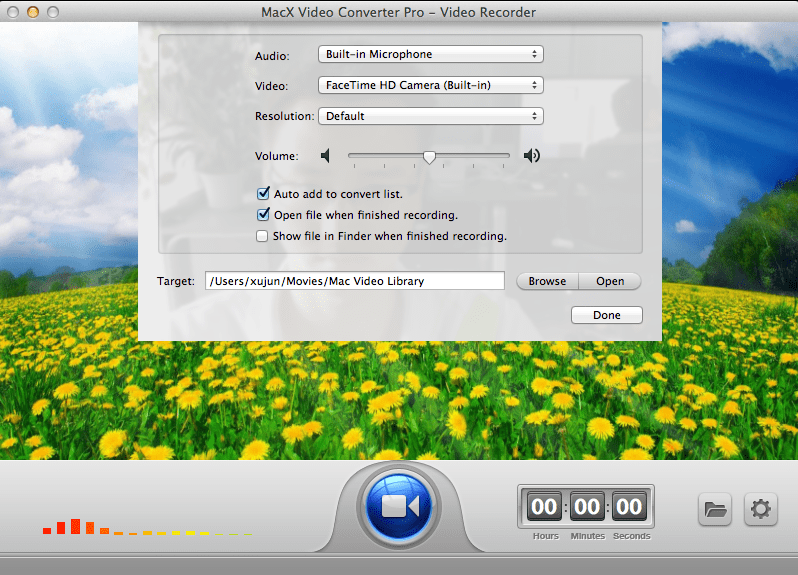
Step 1: Click "Video Recorder" tab, the video recorder window will pop up.
Step 2: Click "Setting" button to choose the devices for video and audio recording.
Step 3: Select a destination folder to save your recorded video by clicking "Browse" button.
The recorded movies will be added to convert list by default, so you can edit the video as you like.
As a component of MacX Video Converter Pro, Screen Recorder is designed to record screen activities taking place on your Mac.
Step 1: Click the "Screen Recorder" button on the main interface of MacX Video Converter Pro.
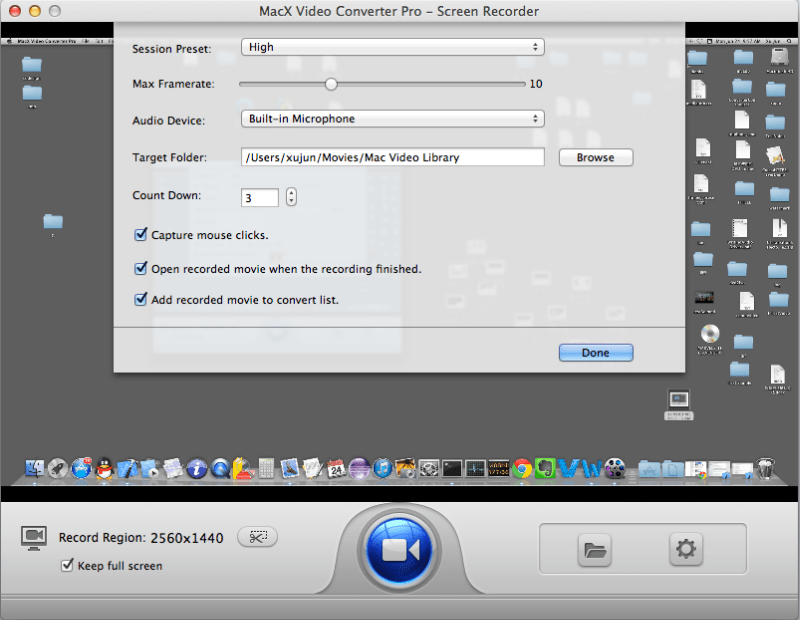
Step 2: Adjust Capture Settings
* Choose "Keep Full Screen" or "Crop Region" to customize the capture area.
* Select the audio device that used to add sound to your video, or disable audio recording completely
* You can also adjust video frame rate or other parameters manually
* The recorded movies will be added to convert list by default.
Step 3: Choose the Destination folder. Click "Folder" button in output setting area and select a destination folder to save your recorded video.
Step 4: Start Record. Click "Start Record" button, the program will start capturing the screen within a few seconds. Click "Stop Record button" to stop the video capturing.
Tip: Once all the steps above are finished, you could close the window, then the recorded videos will be shown on MacX Video Converter Pro automatically for you to further edit or convert.
I had the problem of converting some format. E-mail:support@macxdvd.com
Home | About | Site Map | Privacy Policy | Terms and Conditions | License Agreement | Affiliate | News | Contact Us
Copyright © 2024 Digiarty Software, Inc (MacXDVD). All rights reserved
Apple, the Apple logo, Mac, iPhone, iPad, iPod and iTunes are trademarks of Apple Inc, registered in the U.S. and other countries.
Digiarty Software is not developed by or affiliated with Apple Inc.