

If you need to create instructions for performing a task, show an expert an error message on your Mac, or even prepare a college project, a screencast is the ideal way to show someone exactly what happens on your Mac screen. Thankfully, there are plenty of Mac screen capture tools available for recording screencasts.
No matter what your purpose of using a screen video recorder – creating video tutorials or demo videos on your Mac, recording your games to share with friends, or documenting software bugs – MacX Video Converter Pro is your good choice, which will capture Mac screen activities and sounds in ultra-high quality.
MacX Video Converter Pro is a powerful screen capture for Mac that combines ultimate screen capture and advanced video editor. It supports to record screen on Mac with audio synchronously and add your own narration via microphone to videos. After recording, you can playback the recording video and make an edit to polish them. Its built-in converter allows you to convert the recorded video to other video formats, including MP4, H.264, AVI, FLV, MOV, M2TS, MKV, as well as to video used on iPhone, iPod, iPad, Android devices, and more.
Step-by-step Guide on How to Use This Screen Capture for Mac
Step 1: Click "Screen Recorder" button.
Free download and install this Mac screen recorder (or Windows version), click the "Screen Recorder" button on the main interface.

Step 2: Adjust capture settings.
- Choose "Keep Full Screen" or "Crop Region" to customize the capture area.
- Select the audio device that used to add sound to your video, or disable audio recording completely.
- You can also adjust video frame rate or other parameters manually.
- Select if you want to record screen with system audio, or the sound from built-in microphone the same time.
- The recorded movies will be added to convert list by default.
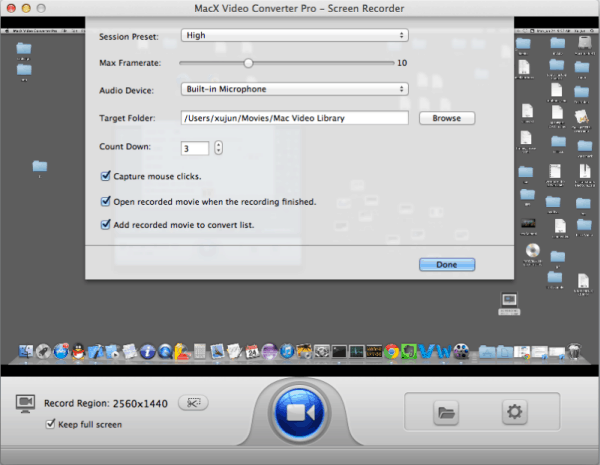
Step 3: Choose the destination folder.
Click "Browse" button in output setting area and select a destination folder to save your captured video.
Step 4: Capture Mac screen.
Hit "Start Record" button to begin recording the screen in 360 degree on your Mac. You can stop the screen capturing process at any time.

When you need to trim or crop the recorded videos, this built-in editor comes in handy. Additionally, with this screen capture for Mac, you can make tutorials for training, record game plays, record video from iMac/Macbook camera, create beautiful photo slideshow and so on.


Candice's particularly skilled in writing and sharing video-related contents. Her guides cover from deep-seated video/audio parameters, to media entertainment on different platforms. She also enjoys shooting and processing videos by herself for a more reliable basis of informative info with her articles, which are never at the expense of eliminating an entertaining read.


