How to Use MacX Video Converter Pro

1. Get Started
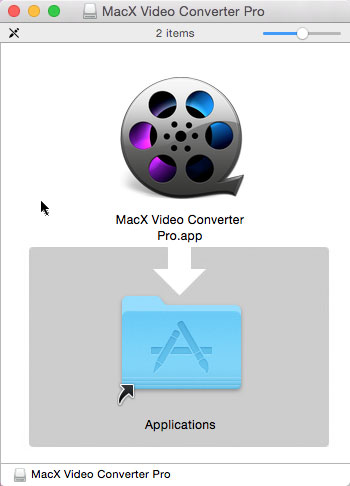
1.1 Download and install MacX Video Converter Pro
Step 1: Before you get started, go to the official site MacX Video Converter Pro or click the download button to get the program on Mac.
Supported macOS: Mac OS X 10.6 and above.

Step 2: Double-click the DMG file you download and open it. A finder window appears, drag the MacX Video Converter Pro icon to the Applications folder and it's done. Now, MacX Video Converter Pro is installed on your computer. You can drag MacX Video Converter Pro to the Dock for easy launching.
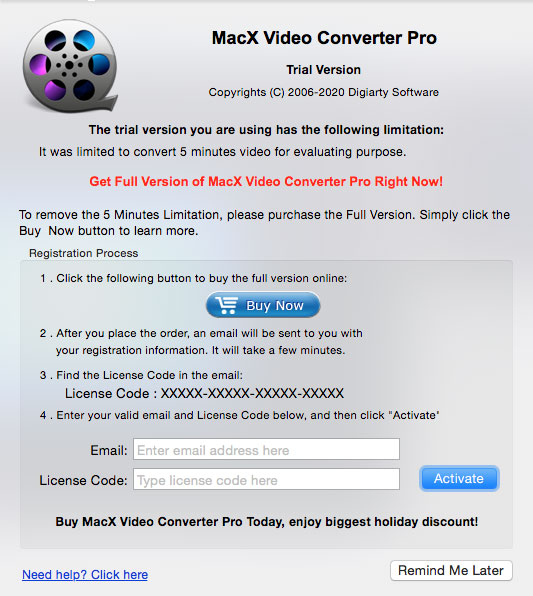
1.2 Trial Version Limitations
MacX Video Converter Pro offers users free trial, but the trial version has the following limits.
The trial version only allows users to convert 5 minutes of each DVD for evaluating purpose.
1. Free users have no access to free update to the latest full version of MacX Video Converter Pro.
2. Some advanced features are not available in trail version.
3. You can follow steps below to register and update to the full version to remove the limits.
1.3 Register
Step 1: Click the Register icon at the bottom of the interface and the Register window will appear.
Step 2: Click the Buy Now button, finish your payment, and you'll receive the registration information.

Step 3: Enter your email address, license code, then click the Activate icon to complete the process and enjoy the full version of MacX Video Converter Pro.
2. Convert & Process Videos
2.1 Transcode Videos to Any Format
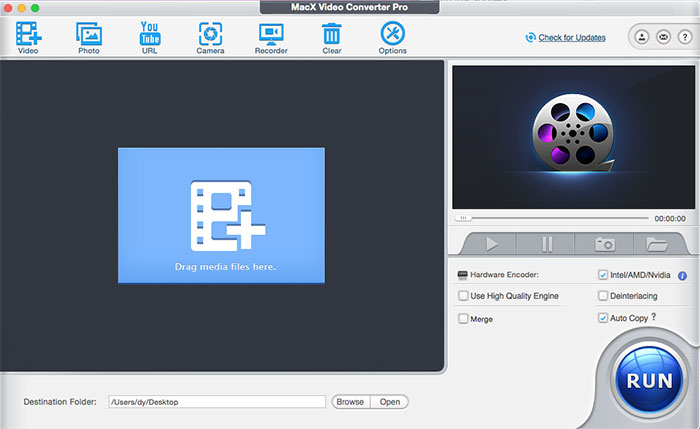
How to convert video files using MacX Video Converter Pro? The following will show you a step-by-step guide to complete conversion tasks. First, download and install MacX Video Converter Pro.
Step 1: Load Video File(s). Run MacX Video Converter Pro and import source video by clicking "Add videos" button. You can add more than one video files at one time.
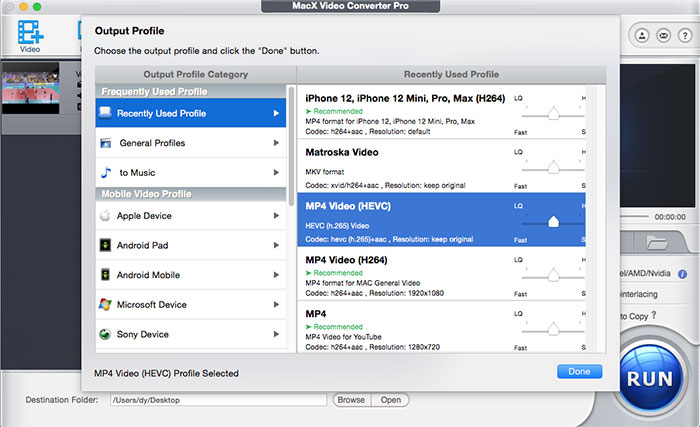
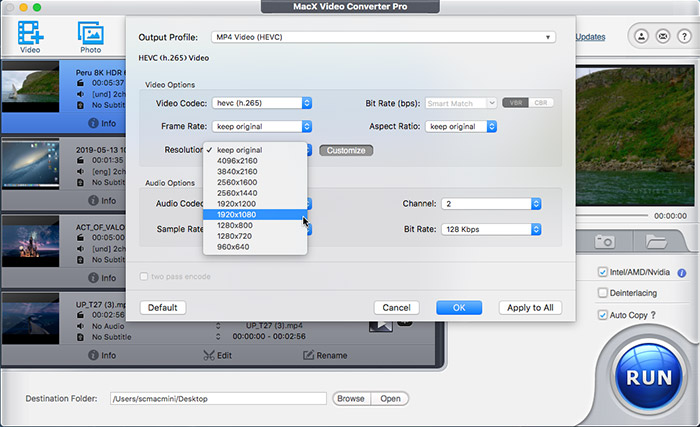
Step 2: Choose the output video/audio format. Click the file in the preview window and select the output video or audio format from the drop-down list.
Step 3: Select Output Folder. Click the "Browse" button to choose the path where you want to save the output file in.
Tips:
1. Flexible parameter settings allows you to adjust frame rate, resolution, bite rate, audio channel, etc according to your advanced need.
2. To improve the output video quality, you can select "High Quality Engine". If your original video is interleaving video, select "Deinterlacing" and the Advanced De-interlace Accelerator can convert it to progressive scanning video with much clearer image.
3. You can also use Hardware Encoder Intel Quick Sync Video to quicken the conversion speed, which will accelerates your video conversion speed up to 16X faster than before and 5X faster than any other converters.
Step 4: Start Conversion. With the above steps done, please click the "RUN" button to start conversion, you could view the conversion progress and are able to cancel the converting process at anytime.
2.2 How to Compress Videos
4K, 8K, 2.7K videos are large in file size. MacX Video Converter Pro can reduce video file size by up to 90% with good size and quality ratio.
Step 1: Import the video file you'd like to shrink.
Step 2: follow the tips below to make your video file size smaller.
* Click the Cut button to cut off unwanted sections.
* Under Video Codec Options, change video codec to cut down the size, for example, HEVC is the most efficient codec for 4K Ultra HD videos.
* Decrease video bit rate by 30% to compress videos without noticeable quality loss.
* Reduce the resolution by clicking the Resolution drop-down icon. Bitrate changes when you adjust the resolution.
Step 3: Click the Done button to apply the compression settings.
2.3 Edit Videos
Click the Video button at the main interface and import the video you wish to edit. The guide below will walk you through the editing process.
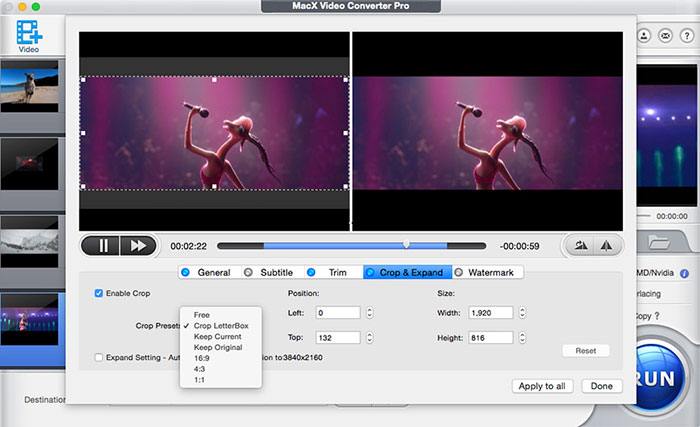
* Crop the Video Size
Select "Edit" tab of the video need to convert, click "Enable Crop" button and adjust your video's aspect ratio to Full Screen, 16:9, 4:3, 1:1, or you can adjust the crop area size and position by dragging the resizable handle and frame. Once you finish your setting, press "Done" to confirm.
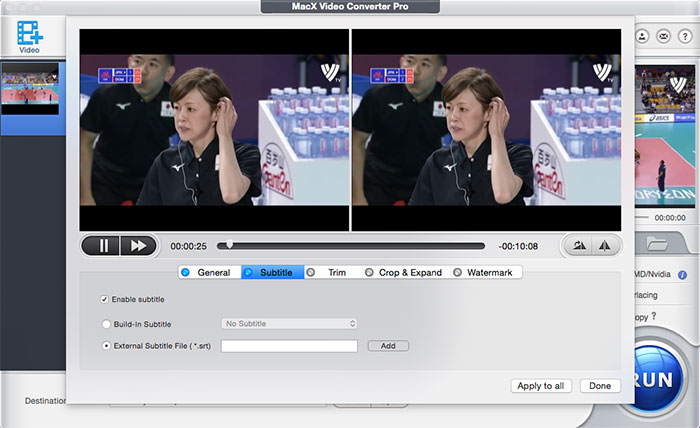
* How to Add Subtitles to Videos
Select "Edit" tab of the video need to convert, click "Enable subtitle" button to add built-in subtitle tracks to the video or you can load an external subtitle file (.ssa, .ass, .srt) to the video. If you don't have a subtitle file yet, go to opensubtitles.org to search and download one for free.
* Trim/Clip Video Segment
Select "Edit" button, the submenu Trim window allows you to adjust the duration of the video segment by dragging the left or right bar under the video preview windows or modify the "Start Time" and "End time" with values directly.
Tips: Some users may encounter the problem as follows: "On one of my video I am trying to convert, when I load it into the program it turns the video upside down. When I play the video with quicktime player it plays fine.
Any ideas on what is going on and how to fix this. "
To tackle the issue, you can simply follow the steps below and make the video normal.
* Add Watermark to the Video
Under "Watermark" tab, tick the option of "Enable Watermark" to import an image watermark or create a text watermark to personalize your video. Also adjust the transparency, vertical and horizontal position of your watermark.
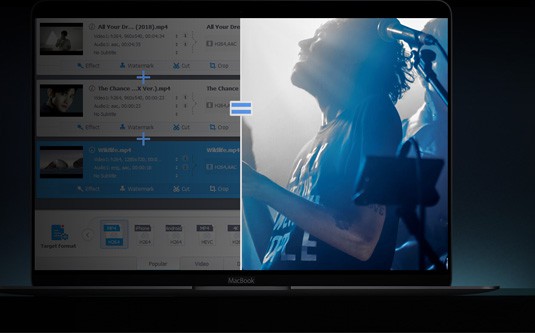
*Merge Video Files
To merge two or more files, select the videos you want to merge, choose the status Merge All ''On'' for merge and click ''Run'' in the main interface.
3. Download Videos and Music
To download online 4K/8K/HD videos and music on Mac, go and hit the "YouTube" button on the main interface of MacX Video Converter Pro, the built-in YouTube Downloader window will pop up automatically as follows.
Step 1: When you find a video you'd like to download, copy the target online video address, paste it to the address bar and click "analyze" to load the YouTube video details in the program. Alternatively, you can click "paste & analyze" button to automatically detect the YouTube video opened in browse.
Step 2: Click "Browse" button to specify an output folder on your computer to save the output files.
Step 3: Hit "Download Now" to start the download.
Tips: To convert YouTube video to more output formats and devices for offline viewing, you can hit "Auto add to convert list" for further YouTube video conversion with MacX Video Converter Pro. After finishing YouTube downloading, the downloaded video will be automatically added to the conversion list.
4. Record Video
4.1 Record Video from Macbook/iMac or External Webcam
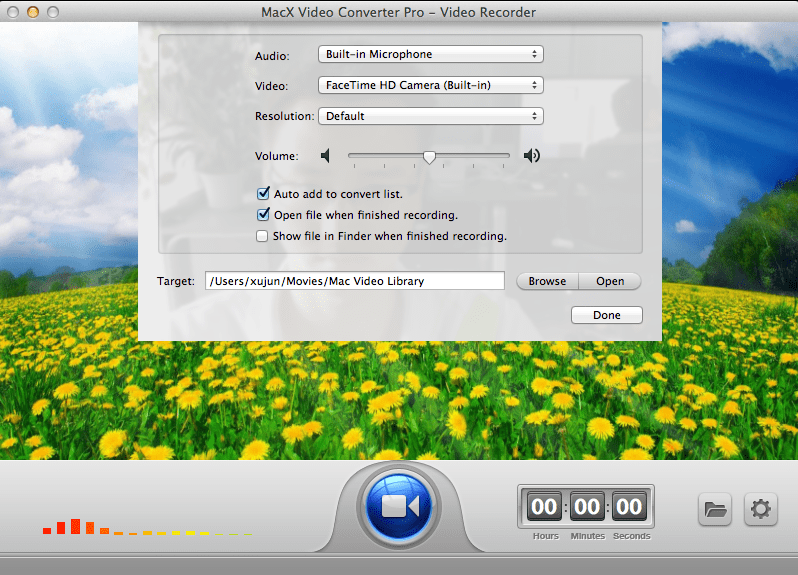
The "Video recorder" feature lets you freely create video clip with Mac's built-in camera (or external connected camera).
Step 1: Click "Video Recorder" tab, the video recorder window will pop up.
Step 2: Click "Setting" button to choose the devices for video and audio recording.
Step 3: Select a destination folder to save your recorded video by clicking "Browse" button.
The recorded movies will be added to convert list by default, so you can edit the video as you like.
4.2 How to Record Screen on Mac OS
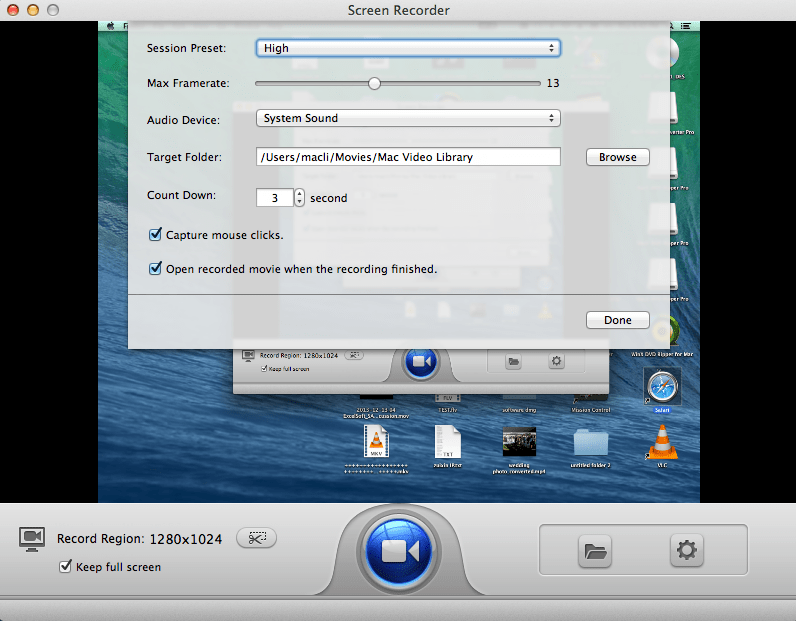
As a component of MacX Video Converter Pro, Screen Recorder is designed to record screen activities taking place on your Mac.
Step 1: Click the "Screen Recorder" button on the main interface of MacX Video Converter Pro. The interface of the screen recorder will pop up as below:
Step 2: Adjust Capture Settings
* Choose "Keep Full Screen" or "Crop Region" to customize the capture area.
* Select the audio device that used to add sound to your video, or disable audio recording completely.
* You can also adjust video frame rate or other parameters manually.
Step 3: Choose the target folder. Click "Browse" button in output setting area and select a destination folder to save your recorded video.
Step 4: Start Record. Click "Record" button, the program will start capturing the screen within a few seconds. Click "Stop Record button" to stop the video capturing. Once all the steps above are finished, you could close the window, and open the recorded video or add the recording to MacX Video Converter Pro for further edit or convert.
Tip: For a proper sound recording, you are advised not to adjust any setting in System Sounds while recording. Otherwise, the suddenly increased volume may threaten your hearing.
5. Uninstall MacX Video Converter Pro
Sometimes you might need to uninstall the MacX Video Converter Pro. Here we provide the exact steps to remove the software on Mac platform.
Step 1: Find the folder containing MacX Video Converter Pro.
Step 2: Drag the software to the Trash icon in the Dock. You'll need administrative rights if it's installed in your Applications folder.
Step 3: Remove MacX Video Converter Pro software from your Dock, simply drag it out of Dock with your mouse.


 1. Get Started