

A good video, whether it be a music video, movie trailer, game walkthrough, camera recording or anything, must be edited after production. But how to edit video on Mac? Filtering, adding subtitles, adding watermark, trimming, rotating, cropping and fading are all included in video editing, but here we're talking about video cutting on Mac. The most basic of video edits is to lop the ends off a clip, to split a long video into clips and to trim a video to make it smaller. After all, watching an exaggerated long video is the equivalent of a conversation with someone who can't get to the point. It's painful. So for everyone's sake, trim and cut videos on your Mac.
Why You Need Trim/Cut/Split Video Clips?
Firstly, this is closely related to your ultimate goals. In other words, it depends on what will you do with the video. Generally, the reasons why people cut their videos come that they want to:
• Upload videos to the web. Video sharing sites has its requirement of the video length, for example, Facebook allows video no longer than 120 minutes, Basic YouTube account accepts videos shorter than 15 minutes, and Instagram supports video of 60 seconds at most. So it's advisable to cut and edit video for Insta, YouTube, Facebook, and the like.
• Reduce size for storage. If you have a limited capacity, like 64GB iPhone, 5GB free storage iCloud space, or a slightly small hard drive, you can cut videos to remove the non-significant parts to reduce the video file size for storage.
• Remove the cruft for a perfect flow. It's inevitable that your recordings are interrupted by unexpected conditions, such as the flickering light, the passersby, or the elusive weather. To ensure a perfect flow, you need cut all these least anticipates out.
• Send videos by email or social media. No matter you'd like share videos with your friends by sending emails or through social media, you have to compress video firstly since they have no access for large videos. For example, Whatsapp allows for videos smaller than 16MB. And video trimming is undoubtedly the most direct way to get it smaller.
• Burn video to DVD discs. There are mainly four sizes for DVDs, DVD-5 (4.37GB), DVD-9(7.95GB), DVD-10(8.75GB), DVD-18(15.9GB). If you'd like burn your large-sized 4K UHD videos to DVD, you do need a 4K video editor to cut 4K videos within the DVD size limits.
Besides, it has something to do with video sources. I mean people get videos in various ways, like record video with DSLR cameras, GoPro, mobiles, download videos from online, or rip videos from DVD, leading a variety of video codecs and formats. Thus to achieve all the goals above, you're asked not only to cut video on Mac, but also a step of re-encoding videos for wide compatibility.
How to Cut Video on MacOS? Three Ways!
There are tons of video cutter and trimmer for MacOS. You can take advantages of the Mac apps distributed from Apple Inc. like Photos and QuickTime Player, and iMovie, or benefit from online video editors such as Online Video Cutter, and even turn to third-party video cutting software like macXvideo and VLC. Each way enables you to cut videos on Mac computer smoothly, but the video quality and video cutting/trimming operation may be jagged. Therefore, to seeking out the best tool for video shearing, let's go over the specific methods.
 Cut Video on Mac for Free with 3rd-Party Video Cutters
1. macXvideo
As a third-party video cutter, macXvideo enjoys the greatest flexibility on cutting videos. You're able to simply trim head and/or the tail of the clip, split videos into fragments, and cut out the unnecessary parts and splice the rest clips together. Besides, the Auto Copy feature enables you to cut video on MacOS without re-encoding, thus you'll experience a super fast speed with the original quality reserved. Of course, the video cutting process can be achieved after re-encoding, which will make video into smaller size but no quality loss. That is to say, if you want to upload a MOV 4K video recorded by Canon DSLR to YouTube, you definitely can transcode MOV to MP4, downscale 4K UHD to 1080p, and then cut video on Mac to get smaller size, better compatibility and same high quality.
>> Free Download macXvideo to Have A Try <<
Easy steps to cut video on Macbook Pro/Air with macXvideo
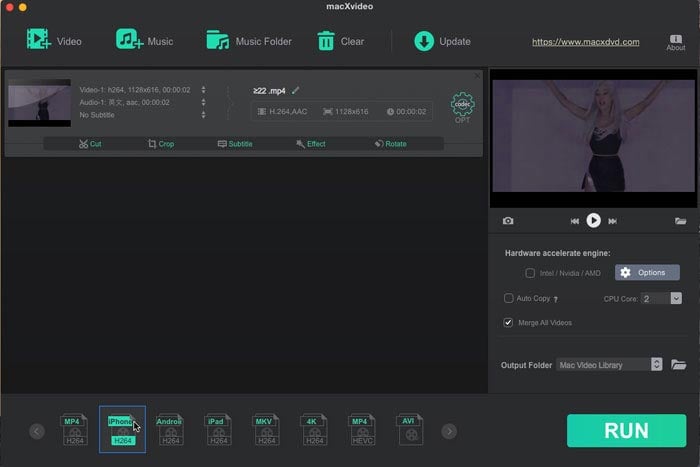
Step 1: Free download the Mac video cutter and launch it. Then click on + Video or simply drag and drop the target video to the program window to import it.
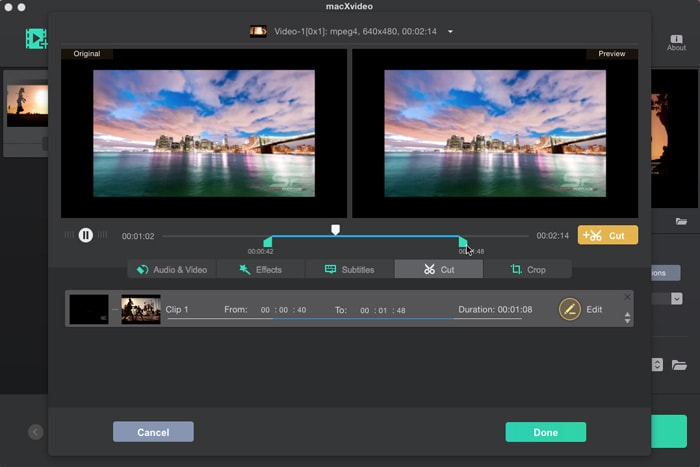
Step 2: Click on the Cut button to enter the video cutting interface. Now drag ![]() knob to set the start and end time of your trimmed video, and click
knob to set the start and end time of your trimmed video, and click ![]() next to the slider to trim the video. Then tap Done icon to make your settings valid.
next to the slider to trim the video. Then tap Done icon to make your settings valid.
Step 3: Optionally, choose output format that you want re-encode your video to. There are dozens of preset profiles fror general-purpose formats, incl. H.264 MP4, iPhone iPad Android, MKV, H.264 4K, HEVC MP4, AVI, MOV, WMV, MP3 etc. You're suggested to choose H.264 MP4 for best compatibility and smaller size, but it all depends on your final purposes. Well, if you want cut your video without re-encoding, just skip this step.
Step 4: Tap RUN button to start video cutting on Mac. If your Mac computer support hardware acceleration (Check by clicking the Options button, if it's available, tick the box of Intel/Nvidia/AMD), the processing will be achieved in a blazing fast speed. Meanwhile, if the video re-encoding processing is omitted, it will be faster indeed.
Related: See how to cut off unwanted clips and extract video segments from DVD
2. VLC
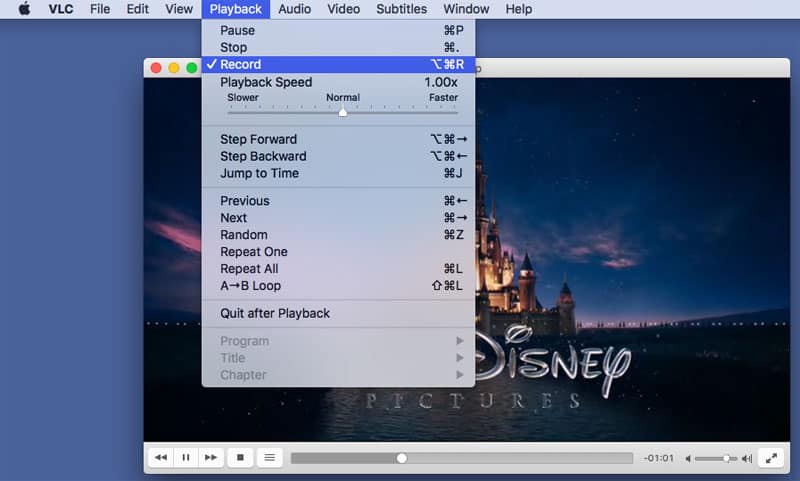
You know what, you can also trim video on Mac with VLC. That means you can select a certain part of your video and cut it out to a smaller clip. You can easily select a beginning point and then an ending point. Then, VLC will automatically cut and save from point A to point B to your PC. But let's face it, after the settings are done, VLC adopts the record mode during playback to cut your video on Mac. It is very complicated and time consuming since you have to wait to the end of the video playback.
To be specific, you need set the default directory location where you want to store the trimmed video by going to VLC Preferences > Input / Codecs > Record directory. Then restart it and play target video on VLC, then go to Playback > Record. As the tick mark appears next to the Record, it means it's recording the video.
 Trim Video with Built-in Mac Apps
1. Photos
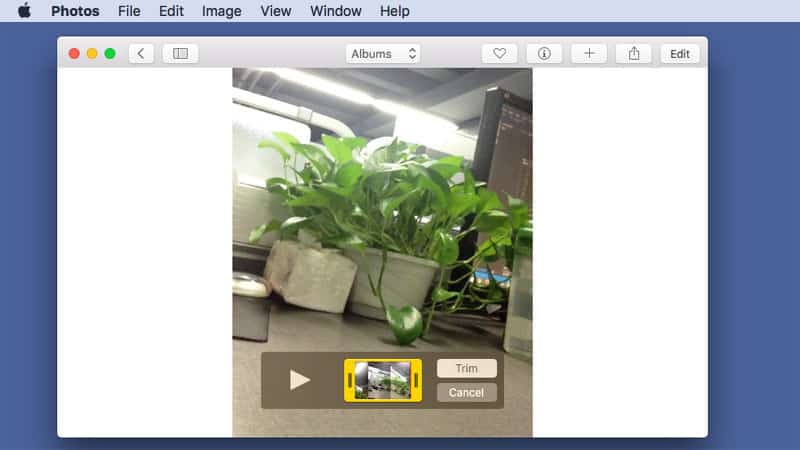
Photos app offers a quite easy way to cut video on Mac for free without re-encoding, thus you can retain the original high quality of your video. But it's only available for videos in Photos Albums, not for the videos you downloaded from YouTube, ripped from DVD discs, or any other sources.
To trim a video clip, find it in the Photos app and tap to open it. Then hit the little setting cog in the playback controls, and choose Trim from the resulting popup menu. Now you see the arrows at either end of the timeline, move them to make sure the start and end time, and click on Trim again, the yellow-box part is what you've trimmed.
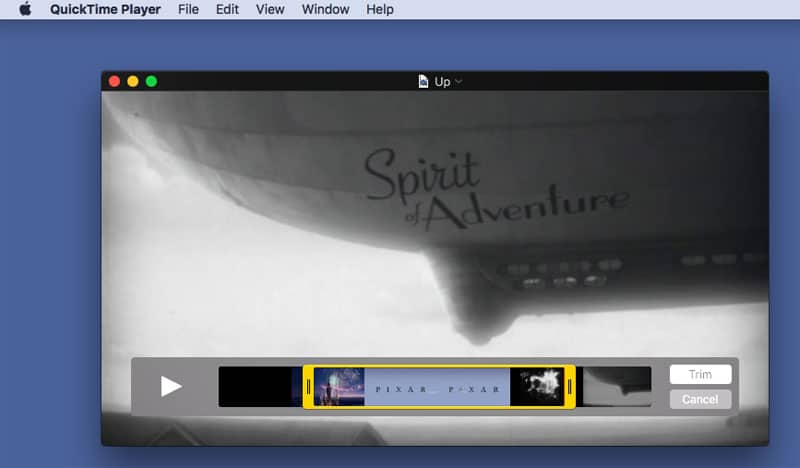
2. QuickTime Player
Likewise, QuickTime Player enables you to shear videos freely in the similar way of Photos app. The difference comes that you can cut all QuickTime supported videos, such as cutting MP4 on Mac, trimming MOV, M4V video indeed. And unless you're in X version, you cannot transcode videos when you are trimming video, which means there won't be any quality degradation at all.
Still, the steps are quite similar to Photos as well. Just open your video with QuickTime, and go Edit > Trim, then a yellow-box pops up, move the arrows and tap on Trim, the video is cut out. Then rename the video and save it. All done!
3. iMovie
How to use iMovie to cut videos? The answer can be wildly simple yet agonizingly difficult. For senior users, it's a powerful video editor on Mac, but it can be a little bit intimidating for beginners. Green hands feel overwhelmed since it's complicated and sometimes they cannot export. And even iMovie keeps crashing at times or the trimmed video quality is poor.
Anyway, to make iMovie easier for beginners, follow this iMovie tutorial for cutting videos on Mac:
1. Firstly, open iMovie and hit Create New icon to create a new project and then import the video you desire to trim by clicking on Import button or simply drag and drop.
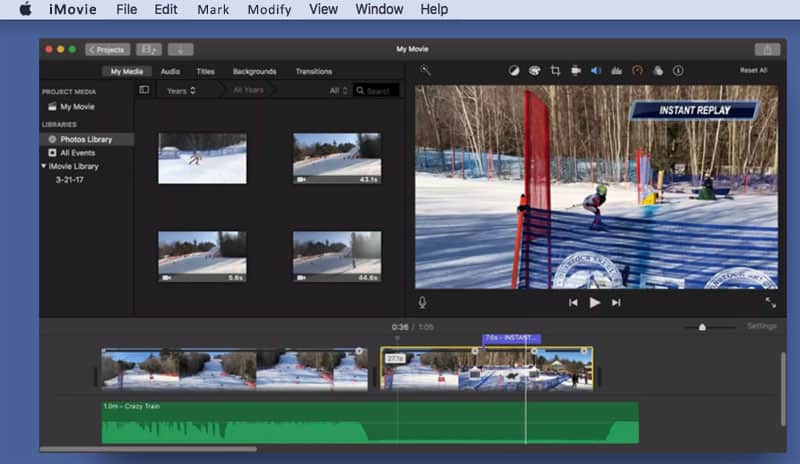
2. In the timeline, skim to the beginning or end of the clip you want to shorten, namely dragging the edge of the clip toward its center. Or you can also trim the unwanted frames using shortcut menu in the timeline: select the range of frames you want to keep in the clip and hold down the R key and drag across the portion of the clip you want to keep. Then control-click the clip and choose Trim Section from the shortcut menu. The clip is trimmed to the boundaries of the selection.
3. After you've done, click the Share button on the top right corner, select file as the destination, choose resolution (up to 4K), quality, and click Next to save your trimmed video. Must-know tips: Correct fisheye distortion
 Shear Videos Through Online Video Cutter
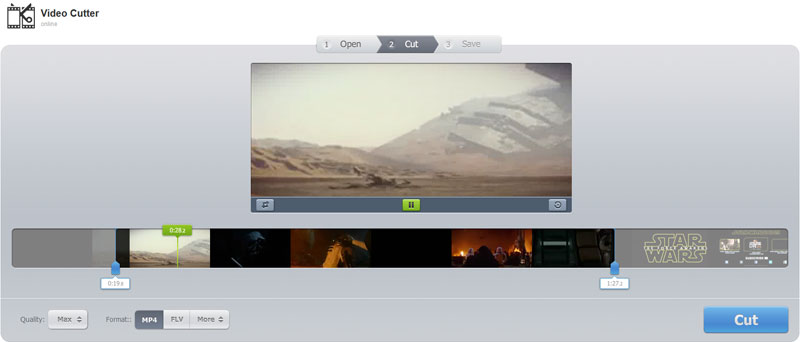
1. Online Video Cutter
The reason why Online Video Cutter being the choice of some Mac users is that it's simple, free and no need to install any software or extensions. You can easily transcode videos to MP4, MOV, AVI, FLV, 3GP, MPG while cutting videos. The maximum quality comes 1080p, and files of up to 500MB are supported. That is to say, you cannot cut 4K UHD videos, or any large videos with this online cutter.
To trim video online, click on Open file to import the video to be cut. Move the arrow cursors to determine the video start and end point. And on the lower left corner, there are options for quality and format, which you can choose according to you needs. After all done, tap the Cut icon to accomplish the cutting, then download to save it locally. By the way, this way is complicated to remove the middle part of the clip and unable to splice video clips together.
To The Conclusion
You see, each way could get video cut/trimmed, but various in the degree of completion. Online video cutter requires Internet connection and you cannot cut video of large file size and high definition. Photos and QuickTime Player can trim video on Mac without quality loss, but no further cutting features like split, and splice trimmed clips together. iMovie gives your more options for video editing, yet that could be complicated and the degraded video quality and the error of failing export may make you depressed. Moreover, it's too rigid for VLC video cutting. If you're going to cut a GoPro Hero 6 recorded 4K UHD video, which gets choppy on your earlier version Macbook, VLC is totally inappropriate for this task since it will record the choppy frames as well in your trimmed video.
Therefore, why not use macXvideo to cut videos on Mac at a quite clip easily and no quality loss? It accepts a wide range of videos, from SD, 720p/1080p HD, 2K, to 4K UHD and even 8K in all common used codecs and formats. And you have an option of re-encoding or not before cutting. The unique video re-encoding option helps you resize video smaller but same high quality. As for video cutting, you're able to trim video length, split video into clips, merge the trimmed video together and crop the video dimensions etc.


