
Generally speaking, with QuickTime installed on Mac, you are allowed to post QuickTime videos to YouTube without worrying about the video format and resolutions, for QuickTime videos, or MOVs, are natively supported by YouTube. However, cases are always exceptions to the rule.
As QuickTime file is comparatively large in size, all you need to do is to guarantee your QuickTime file smaller than 2GB and less than 15 minutes in length by default. Then make sure your QuickTime video is encoded in H.264 and AAC that YouTube accepts well. Or else, you probably encounter nothing but Waterloo.
Download to Upload 4K/HD QuickTime MOV to YouTube Faster!
Generally speaking, MOV is just slightly bigger than MP4 in size when it comes to use the same codec. But if your MOV recording file comes from your iPhone at 4K 30FPS encoded by ProRes codec, the MOV size is far larger than that of MP4 (to be specific, YouTube recommended bitrate for 4K 30FPS H264 is 35-45Mbps while that for 4K 30FPS ProRes 422 goes to 589Mbps - 4.42GB per minute, let alone ProRes 422 HQ/4444).
What's plus, ProRes 422 is the highest quality standard to upload to YouTube. If your QuickTime ProRes mov file is encoded by ProRes 422 HQ or ProRes 4444/XQ, you're demanded to convert QT MOV ProRes to H264 codec for compatibility.
Here comes Macxvideo AI, helping you free convert & compress MOV QT (HEVC hvc1, MPEG-4, H264, ProRes 422/HQ/4444/XQ) to YouTube MP4 (H264 AAC), FLV, WebM with 3 clicks. Thus, you can get a desired video with quality and file size (roughly 2GB) well balanced. High Quality Engine guarantees you the highest output quality (up to 98% kept)!
It also bulk converts GoPro CineForm codec video, Handbrake hev1, DJI video to YouTube best format MP4 H264 with proper file size after efficient compression (codec conversion, trim, crop, split, resolution, bitrate, frame rate adjustment).
Part 1: How to Compress & Convert QuickTime to YouTube
Step 1: Load QuickTime File You Want to Convert.
Free download this free QuickTime converter on Mac and launch it; load the QuickTime MOV files by hitting "Add File" button.
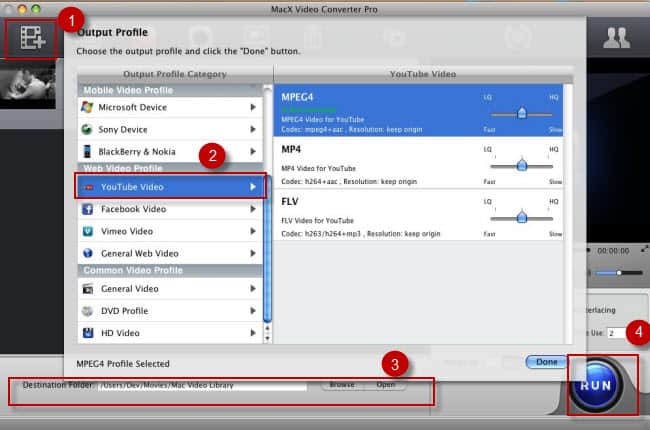
Step 2: Choose Output Video Format.
Select the target format "to YouTube Video"→"to FLV/MP4/MPEG4" from Web Video Profile.
Tips: It's totally at your disposal to apply this fascinating program to trim, crop, split video, add watermark and external subtitle to the video, and adjust video/audio parameters (resolution 5.3K to 4K, 4K to 1080p/2K, frame rate 60FPS to 30FPS, bit rate...) to reduce MOV QuickTime footage if its size is too large to upload.
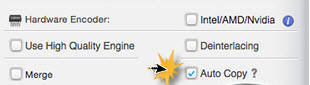
Note: providing you wanna keep the identical codec between QT .mov input and YouTube output (namely MOV H264 to MP4 H264), manually tick "Auto Copy" mode at the lower right-hand of the main interface. By dint of this mode, this quicktime to YouTube converter will remux (passthrough) MOV to MP4 without decoding/re-encoding. Thus, the quality of your resulting file is at 1:1 original ratio and the whole process is 10X faster than video transcoding.
Step 3: Select Output Folder.
Specify an output folder on your computer to save the output files. Click "Browse" button to choose the path where you want to save the output files in.
Step 4: Start to Convert Compress QuickTime Files
After finishing the above steps, click the "RUN" button to start converting QuickTime to YouTube on macOS, you could view the conversion progress and are able to cancel the converting process at anytime with the video to YouTube converter.
After the conversion, you can commence to upload QuickTime MP4 to YouTube right now.
Part 2: How to Share QuickTime Video Files to YouTube on macOS
Step 1: Launch your Web browser and visit YouTube.com. Click the "Upload" link on the top right corner.
Step 2: Click the "Select Files to Upload" button to import the converted QuickTime video.
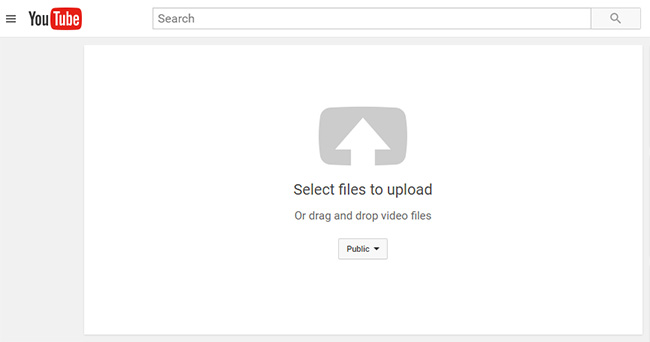
Step 3: Click the "Upload" button to begin the sharing process. While it uploads, enter any pertinent information for your video (e.g. Title, Description, Category, etc). You can also choose to share QuickTime video on FaceBook, Twitter, and Google+.
Step 4: Press the "Publish" button, done! You eventually complete post videos from QT to YouTube and you can share your QuickTime video with friends on YouTube.
More information: For those who would like to download HD video to iPhone, iPad, iPad mini (Retina)/Air, iPad Pro, Samsung Galaxy S21 for offline watching, Macxvideo AI is the very one you can count on.
Notice: MacXDVD Software doesn't advocate any reproduce, distribute, transmit, broadcast or sell any content for any other purposes without prior written permission of YouTube or the respective licensors of the content. Please refer to YouTube terms of service before doing so.


Candice's particularly skilled in writing and sharing video-related contents. Her guides cover from deep-seated video/audio parameters, to media entertainment on different platforms. She also enjoys shooting and processing videos by herself for a more reliable basis of informative info with her articles, which are never at the expense of eliminating an entertaining read.


