

The latest macOS 13 Ventura has brought many exciting new features to make things more efficient on Mac and add more fun. Unlike other minior updates, Ventura will make significant changes to your computer. If you're planning to upgrade from Big Sur/Monterey to Ventura, you may want to do it right. Here we've got the step-by-step instructions for how you'll download and install macOS Ventura to your Mac.

Why Should You Upgrade to macOS 13 Ventura?
What are the benefits will you get after you upgrade macOS Monterey to Ventura? macOS Ventura is packed full of plenty of great features to make the Apple ecosystem more efficient, more secure, and more powerful, giving people a big reason to update to macOS 13 Ventura.
- Stage Manager. In Ventura, you're allowed to use the new multitasking feature, Stage Manager, to organize apps and windows and switch between different tasks easily.
- SharePlay. The new FaceTime feature SharePlay lets you share movies, music, screens, etc. with families and friends within a FaceTime video call.
- Continuity Camera. After the Ventura update, you can use your iPhone as a webcam thanks to the continuity camera feature.
- New messenger features. New messenger is now available on macOS Ventura, supporting editing and deleting messages up to 15 minutes after sending. You can also recover deleted messages for up to 30 days.
- Better Photos app. macOS 13 Ventura comes with improved Photos app, helping detect and merge the duplicate photos.
Does Your Mac Support Ventura Update?
Before you upgrade your Mac computer to macOS 13 Ventura, make sure your Mac is not too old to get updated. Check if your Mac is one of the following Ventura compatible devices.
- MacBook: 2017 and later
- MacBook Pro: 2017 and later
- MacBook Air: 2018 and later
- iMac: 2017 and later
- iMac Pro: 2017 and later
- Mac Mini: 2018 and later
- Mac Pro: 2019 and later
- Mac Studio: 2022
Back up Mac Before macOS 13 Ventura Update
Before you download and upgrade to Ventura, backing up Mac is the first essential step. While it requires only clicks to download and install Ventura, there is a big chance that macOS Ventura upgrade problems will occur. Always remember to back up Mac (M1 and Intel-based Mac) before updating to the latest macOS.
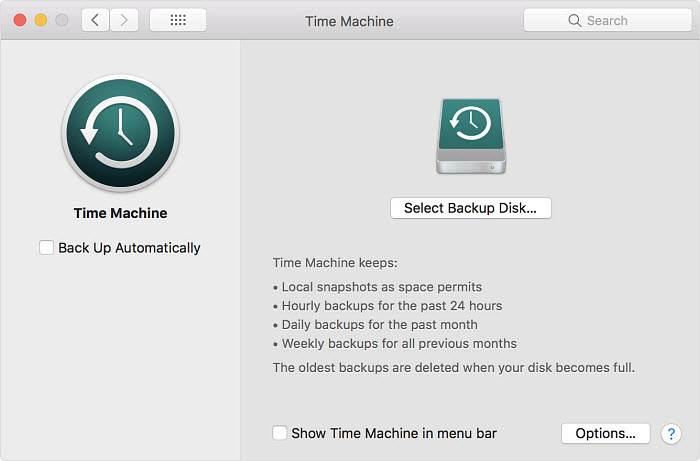
1. Make an archived backup of your Mac with Time Machine
- Connect an external hard drive to Mac (the drive should be at least the same size as your Mac's internal drive).
- Click System Preferences > Time Machine > toggle the switch from "Off" to "On."
- Then click the Select Disk… to select the drive or volume you want to use for Time Machine and it will start to backup before you update.
Note: This backup depends heavily on the internet speed and data volume, it can be slow and run into problems with stuck Mac sometimes.
2. Back up important media in one click
Back up the large files, such as videos and photos can take a long time using Time Machine. If you have saved tons of pictures and videos on your Mac, you can back up them immediately with MacX MediaTrans.
It will backup your Mac computer file to a hard drive, or turn your iPhone iPad into a flash drive. You can back up all your music, videos, photos, apps, documents, etc, and restores the backup files to Mac by simply drag and drop.
- Free download the macOS 13 Ventura upgrading helper on Mac and launch it. Then connect your iPhone to Mac via a USB cable. If you want to mount iPhone as a hard disk drive to save the Mac backup, make sure it has enough storage.
- Click the Flash Drive icon on the main interface of the Mac backup program.
- Click Add and select the data to be backed up and the data will be moved to mobiles instantly. You are allowed to back up Mac music, videos, photos, documents, PDF, PPT, RAR, etc. A safe Mac backup will be created in one click for Big Sur to Ventura upgrade.

Free up Space on Mac for Ventura Update
The macOS Ventura installer is about 12GB in size.
But that's not enough to get Ventura update successfully as it requires extra space to deploy and perform the Ventura installation. In fact, you may need at least 30GB to install macOS 13. That's a huge amount of space for Macs with 128GB. If your Mac doesn't have enough space to upgrade, you can:
- Delete unnecessary apps, music, videos, emails, message attachments, etc. from your Mac.
- Upgrade your Mac to Ventura from an external drive: Download the Installation File > find it in the Applications > copy it to an external drive > on the external drive, create an alias to that Installation File > copy the Alias to the MacBookPro > Double click on the Alias to the Installation File to install.
- Store the large media like the videos, photos, music, etc. to your iPhone, iPad, external drive using MacX MediaTrans.
Download and Install macOS 13 Ventura
While macOS Ventura is not officially released, Apple has released macOS Ventura public beta for early users to upgrade and test. If you already have the macOS public beta installed, just head to System Preferences > Software Updates and download the latest version away. If you don't know how to update Big Sur to macOS 13 Ventura public beta, here is how.
How to Download macOS 13 Ventura
- On your Mac, head to beta.apple.com in Safari.
- Sign in with your Apple ID and select macOS on the Guide for Public Betas page.
- Scroll down under the Get Started section and click Enroll in your Mac.
- On the next page, click on the blue button labeled Download the macOS Public Beta Access Utility.
- Head to your Downloads folder and double-click the downloaded macOS Beta Access Utility to mount it.
- Once the utility is installed, the System Preferences > Software Update window should launch automatically with the macOS 13 Ventura beta appearing, click Download.
- Follow the prompts to download macOS Ventura.

How to Install and Updated to maOS 13 Ventura
The macOS Ventura installer will automatically appear once the download process finishes. You can also find the Ventura installer via Spotlight or Launchpad or from the App folder in the Finder. Use the following steps to install and update to macOS 13 Ventura.
- Click Continue at the bottom when the macOS Ventura installer opens.
- Click Continue if you are asked to make a backup. Click Cancel if you have already made a backup before you update to macOS Ventura.
- Click Agree and accept the licensing terms. Click Agree again to confirm.
- Select the drive you want to install onto and click Install to start installing macOS Ventura.
- Enter administrator password and click OK to continue.
- Click Restart to finish the install. Now you should update to macOS 13 Ventura successfully.

How to Upgrade from Two Previous macOS Version to Ventura
If you are running the recent macOS version, macOS Monterey or Big ur, it's quite easy to update from the recent macOS version to the latest Ventura. Go to System Preferences to open Software Update and you can update from the Monterey or Big Sur to Ventura. Follow the guide below on how to update from Monterey or Big Sur to Ventura.
- Click the Apple icon in the screen.
- Click System Preferences.
- Select Software Update.
- Click Update Now when it's available.
- The macOS 13 Ventura installation process will begin automatically. Wait for the installation process. It may take a long time.
Why can't I Update to macOS Ventura?
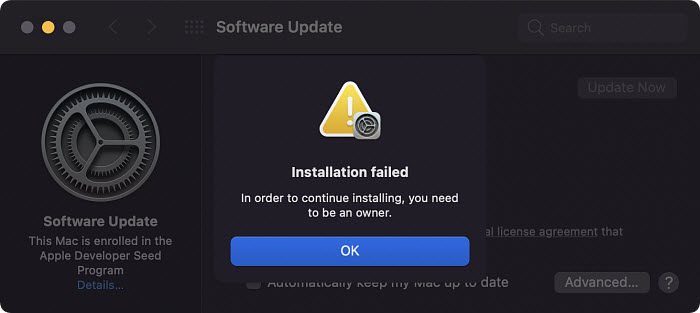
Errors may occur during the Ventura download and installation. For example, you may see errors like "Installation failed. In order to continue installing, you need to be an owner.", "An error occurred preparing the update. - Failed to personalize the software update. Please try again.", "The operation couldn't be completed" on MacBook Air M1... In fact, you can't upgrade your Mac to macOS 13 Ventura successfully for different reasons. If you fail to upgrade to macOS Ventura, try the solutions below (here are all the macOS Ventura problems & fixes):
- Make sure that your Mac is not too old to update to Ventura and make sure you have enough space on your Mac.
- Turn on Content Caching in System Preferences > Sharing > turn on Content Caching.
- Try to download the Ventura installer from the Mac App Store or even Apple's website.
- Make sure that you have an Internet connection to update your Mac.
- Enable the root user before installation, then disable it.
- Try installing the macOS 13 beta from inside the recovery mode.
- Remove any external hard drives or peripherals connected to your Mac and try again.
- If you see "The macOS is downloaded but there is no prompt to install it.", find the installer "Install macOS 13 " in the application folder and double-click it to start the installation manually.
- If the Ventura installation gets stuck/frozen at any point, try to update Ventura in the Safe Mode.
After macOS 13 Ventura Update
Having installed Ventura successfully on Mac doesn't mean the end of the story. Why it always requires some time for a major system upgrade? Because there are a slew of clean-up tasks after the update to get your Mac work like normal. For example:
- Restore your updated Mac from the Time Machine backup or other backups.
- You will be asked to enter the Apple ID password and Mac's password to update the authentication in the new macOS Ventura.
- Some apps may have to ask for permission to access your contacts and calendar even though you previously granted permission.
- You will need to re-enable that in System Preferences > Security & Privacy > General if you use the Apple Watch to unlock your Mac and apps.
- You may need to log in your Gmail or Google Calendar or other Google services again.


