How to Downgrade iOS 17 to iOS 16 without Losing Data
iOS 17 is still very new. Advanced users who have install iOS 17 soon find that it's in limbo right now. Like previous versions, bugs, stability and performance issues creep up with iOS 17 Update at first. Before Apple irons out most of the iOS 17 bugs, users who are tired of dealing with iOS 17 problems or don't have the same pleasant experience with iOS 17 vs iOS 17 can select to go back to iOS 17. If you decide to try it out, here is how to downgrade iOS 17 on iPhone to iOS 17 without losing data.
How to Downgrade iOS 17 to 13?
- 1: iOS 17 Bugs that Make You Want to Go Back to iOS 17
- 2: Back up iPhone to Avoid Data Loss in iOS 17 Downgrade
- 3: Steps to Downgrade iOS 17 to iOS 16
iOS 17 Bugs & Problems Discovered so Far
After you update to iOS 17, you can enjoy various benefits compared to iOS 17, for example, the beautiful design, improved performance & apps, new features, etc. However, the biggest disadvantage of iOS 17 vs iOS 17 is that, it's still new. It is a given that the OS 14 is now filled with bugs and issues waiting for Apple fixes. Due to those iOS 17 problems, users who have updated want to go back to iOS 17 for more stable performance compared to iOS 17.
• iOS 17 crashes on all apps and apps like Camera won't open, Viber won't respond to touch screen, text or answer a call.
• iOS 17 iPhone hangs and restart automatically for a couple of times.
• iOS 17 iPhone won't connect to Wi-Fi, or the Wi-Fi keeps dropping out frequently.
• iOS 17 overheating issues with battery drains explicitly fast.
• iOS 17 GPS problems like signal not found, not updating location, slow in tracking, showing the wrong place, etc.
• The Bluetooth on iOS 17 keeps disconnecting. And the AirPods Pro won't connect to iPhone or stops connecting randomly.
• The storage on iPhone becomes full after iOS 17 Update, saying the storage is being used for a task named "Other" which you can't clear.
• The Safari keeps giving an error saying "A problem repeatedly occurred.. " on most all websites.
Check all iOS 17 bugs discovered so far (with fixes) >>
Part 1: Back up Your iPhone for iOS 17 Downgrade without Data Loss
Method 1: Backup via iTunes/Finder
To downgrade iOS 17 to 13 without losing data, you need to create a backup before you go. To backup iPhone, you need the latest version of iTunes if you're using Windows or a Mac with a macOS 10.14 or earlier; use Finder on a Mac with macOS Big Sur. The backup process using either iTunes or Finder is quite the same.
Step 1: Connect your iPhone to the Mac using a USB-C cable. Then find your device in the left column of the Finder window under the Locations section; in iTunes, you should find your iPhone under Devices or see a small iPhone icon in the upper left corner.
Step 2: Click on your iPhone to enter into the Summary screen. Under General section, you should find two backup options:
• Back up the most important data on your iPhone to iCloud (iCloud in iTunes): A backup the "most important" data including application data, device settings, messages, photos, and more.
• Back up all of the data on your iPhone to this Mac (This Computer in iTunes): A backup of everything on your device, including music and videos not purchased or downloaded from Apple Music and other items not uploaded to your iCloud.
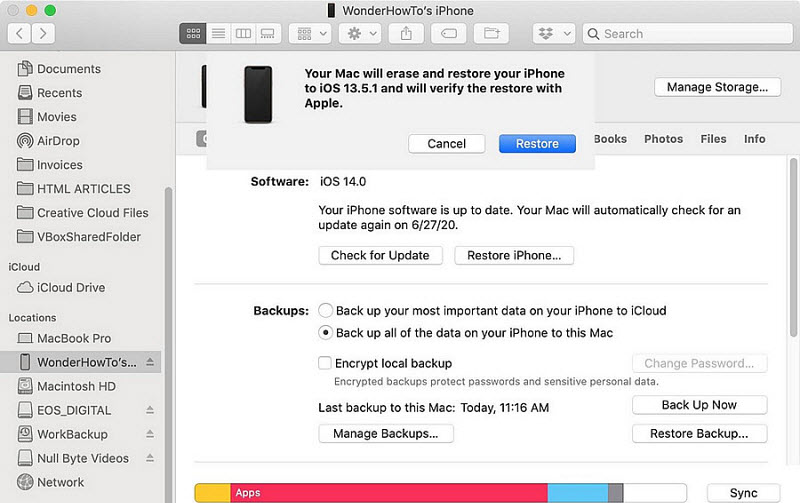
Step 3: Select the backup option you want, then click Back Up Now and wait.
Note:
• Backing up using iTunes or Finder only allows you to back up certain or full data on your iPhone.
• Apple can't restore a backup of a higher version on a lower version. That means, after you go back from iOS 17 to 13, you can only restore backups made before iOS 17 upgrade.
• When you restore iPhone after iOS 17 downgrade, you may lose data as iTunes will erase the exsiting data on your iPhone.
Method 2: Backup via MacX MediaTrans
If you want to back up data flexibly & quickly, try MacX MediaTrans (free download Mac version or Windows version). It offers two-way sync data between iPhone and the computer, letting you back up any selected or full of your iPhone data in clicks.
Step 1: Connect iPhone to Mac via USB-C cable and open the program.
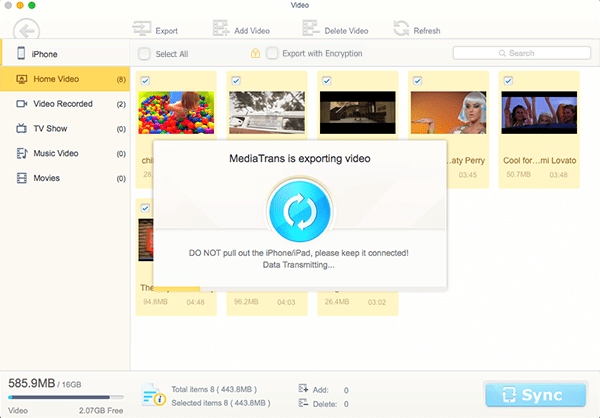
Step 2: Then you can see all the files store on your iPhone, like music, photos, videos, books, ringtones, etc. Select what you want to backup, like Video.
Step 3: On the Video page, choose Select All or any videos (including the videos purchased/downloaded from Apple or not), and hit Export. Then the selected songs will be saved to the folder you set on the computer.
Part 2: [Tutorial] How to Downgrade iOS 17 to iOS 16 without Losing Data?
In order to uninstall iOS 17 and back to iOS 17, you'll have to completely erase and restore your device. Similarly, you will need iTunes for Windows or macOS earlier than Big Sur, or Finder on macOS Big Sur and later.
Method 1: How to Downgrade iOS 17 to 13 via Recovery Mode
Step 1: Connect your iPhone to the computer using a USB-C cable.
Step 2: Open iTunes on Windows, or Finder on macOS Big Sur and later. Click on the iPhone icon located below the menu bar in iTunes.
Step 3: Enter into the Recovery Mode by following the methods below:
• For iPhone 8 and later, press and quickly release the Volume Up button, then the Volume Down button. Then, press and hold the Side button until you see the recovery mode screen.
• For iPhone 7, iPhone 7 Plus, and iPod touch (7th generation), hold in the sleep/wake button and the Volume Up button at the same time until you see the recovery mode screen.
• For iPhone 6s or earlier, iPad with Home button, and iPod touch (6th generation) or earlier, hold in the sleep/wake button and the home button at the same time until you see the recovery mode screen.
• For iPads with Face ID, press and quickly release the Volume Up button, then the Volume Down button. Then hold in the Top button until you see the recovery screen.
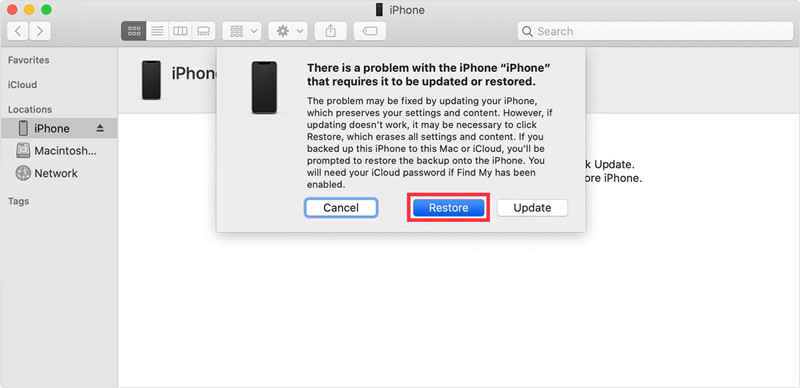
Step 4: Then click the Restore option. Your iPhone will be erased and the latest version of iOS 17 will be installed. After you downgrade iOS 17 to iOS 16, you can restore your data backup from Mac/PC.
Note, you can only restore iOS 17 local backup made before iOS 17. But you can restore backups made with MacX MediaTrans anytime you want.
Method 2: How to Downgrade iOS 17 to 13 via IPSW File
Prerequisites
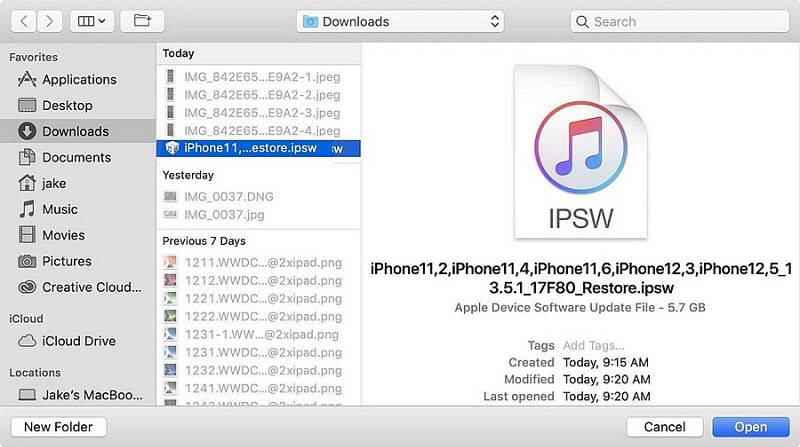
• Download the latest iOS 17.7 / iPadOS 13.7 IPSW file and save it to your desktop
• Turn off Find My iPhone by going to Settings > Find My > Find My iPhone
Step 1: Connect your iPhone to your PC or Mac using a USB-C cable.
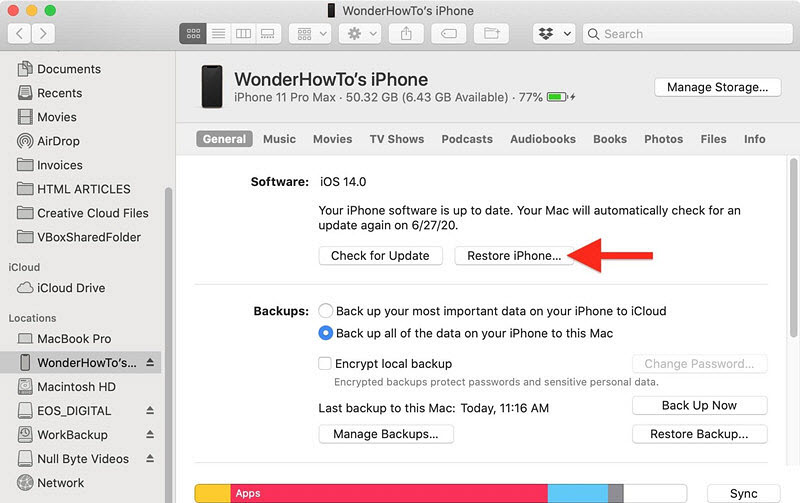
Step 2: Launch iTunes or Finder. Click the iPhone icon on the top left hand corner in iTunes or select your device from the left hand bar in Finder.
Step 3: Click on the Restore iPhone/iPad button while holding the left Option key (Mac) or the left Shift key (Windows).
Step 4: Now select the iOS 17 IPSW firmware file you downloaded earlier.
Step 5: Let iTunes or Finder extract the firmware. Click Update to start the iOS 17 to iOS 16 downgrade process.