
Recording screen on Mac has been highly demanded for a long time, either for sharing a tutorial, capturing a game play video or creating a product demonstration. And this can be achieved with QuickTime player. It's built in a reliable screen recorder for Mac users to capture screen activities on macOS in a few clicks.
But Mac users many understand QuickTime is malfunctioned to record audio along with screen recording on their Macs, especially when it comes to capturing the sound playing in games, movies, or software running on your Mac. It must rely on the third-party audio recording helper Soundflower to accomplish both screen and audio recording on macOS. If you are fed up with no sound error during screen recording using Mac's QuickTime player, this post will be helpful for you to record Roblox gameplays, tutorials, instructions, and any other you've displayed on Mac screen.

QuickTime Won't Record Screen with Sound? Just Try Macxvideo AI!
Macxvideo AI- Freely record your Mac screen activities with crystal-clear system sound and microphone audio, enhanced by advanced AI noise removal to eliminate background distractions. Unlike QuickTime, this Mac screen recorder gives you full control over recording quality, file size, and output formats. After recording, easily edit your videos with tools to trim, cut, crop, merge, rotate, add watermarks, or insert external subtitles — all within one intuitive tool.
Macxvideo AI is for macOS, while Winxvideo AI (from our WinXDVD brand) is for PC.
Table of Contents
Part 1: How to Record Screen on Mac with Audio Using QuickTime
QuickTime is far from perfect when you want to record Mac screen together with audio the computer is producing, even when you raise the volume on your speakers. This following steps are in response to QuickTime not recoding sound error.
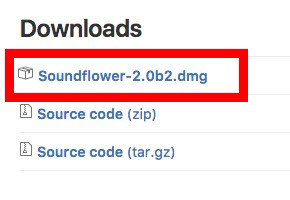
Step 1: Go to Github to finding Soundflower-2.0b2.dmg to download and install Soundflower, which is actually an extension to Mac devices that allows you to route system audio within your Mac.
Step 2: Restart your system so as to avoid any recording trouble.
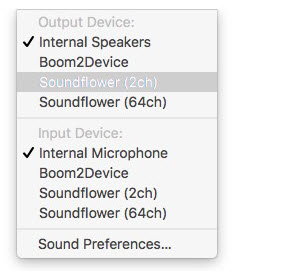
Step 3: Go to Sound system preference, select the Output tab and choose SoundFlower (2ch) for current audio recording.
Step 4: Open QuickTime Player and initiate the screen recording process after adjusting the sound recording. Go to File on the top bar and select New Screen Recording from the drop-down menu.
Step 5: Tap the little arrow on the screen to start the recording process on Mac screen. Then the QuickTime player will record high-quality video on Mac screen along with high-quality audio by virtue of SoundFlower.
Step 6: Go to System preferences, select the sound settings and choose Internal Speakers as destination to get back your audio on speakers after finishing the screen recording on Mac.
Related: record game video, record YouTube video, record 360 video
QuickTime player is totally free and easy to use, which generates videos with high quality. But it isn't the best option for Mac screen recording with sound, because of the following problems:
- QuickTime player cannot record the audio playing on your Mac during screen recording. You have to rely on SoundFlower or others to capture both sound and video with Mac screen.
- You have to do some settings before and after the screen recording process, which is troublesome and time-consuming.
- You have to disconnect SoundFlower in order to hear sound from speakers.
- QuickTime Player gives no more control in the output options. You cannot record the screen in a format other than MOV or MP4. Besides, the resolution is restricted within 1080p or 720p. This means you have to rely on other software to convert the recorded video to other format for further playing or uploading.
- Many screen recorders for Mac, including QuickTime, are prohibited from capturing DRM-protected videos, e.g. iTunes movies, or the copy protected DVDs. So you have to rip the protected DVD or remove DRM from iTunes first before recording.
Part 2: How to Record Screen & Sound on Mac with Macxvideo AI
If you’re looking for a reliable free screen recorder for Mac, Macxvideo AI is a top choice with excellent reviews. Whether you’re capturing streaming videos from YouTube, software training sessions, app demos, video calls, or immersive full-screen 3D games, this Mac screen recorder handles it all smoothly — recording system audio, microphone input, or any external mic connected to your Mac with ease. Powered by advanced AI audio noise suppression, it ensures crystal-clear sound by removing unwanted background noise. After recording, you can directly edit your videos with features like trimming, cutting, cropping, merging, rotating, adding watermarks, or inserting external subtitles, all within a user-friendly interface designed for both beginners and pros.
Step 1: Free download the screen recorder on Mac. Install and run it. Then click Screen Recorder on the main interface to initiate the screen recording feature.
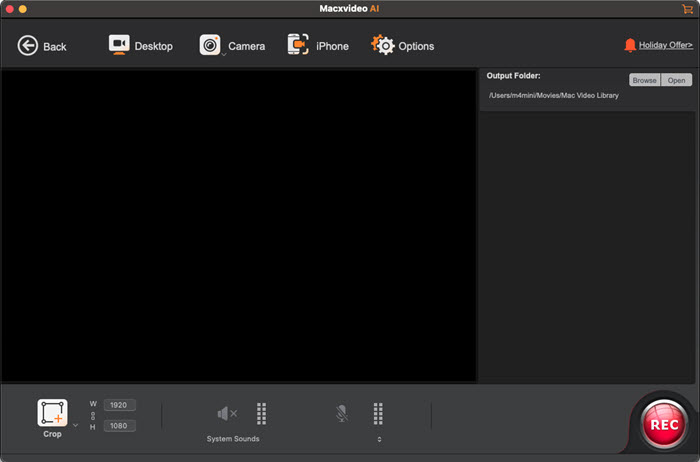
Step 2: Do some screen recording settings:
- Go to Setting -> Audio Device -> System Sound. Then a message will pop up informing you of installing add-on software to record audio. Just follow the steps and click Install Software button to record screen on Mac with audio.
- choose the Session Preset and move the Framrate slider to determine the quality of the recorded video.
- Set the output folder to save the file from the Target Folder.
- Crop the specific area of the screen to record or simple check Keep full screen if you want to record full screen video on Mac.
- Check Add recorded movie to convert list, in case you want to convert the screen recording to specific format.
Step 3: Hit Record blue button, then the screen recorder for Mac will capture the screen activities happening on Mac.


Candice's particularly skilled in writing and sharing video-related contents. Her guides cover from deep-seated video/audio parameters, to media entertainment on different platforms. She also enjoys shooting and processing videos by herself for a more reliable basis of informative info with her articles, which are never at the expense of eliminating an entertaining read.


