How to transfer photos from iPhone to iPhone without using iCloud or iTunes? Is there any way to selectively copy iPhone pictures to another iPhone? Congrats! You come to the right place, where you can learn the detailed guide to sync the whole camera roll from old iPhone to new iPhone, as well as the tutorial to selectively backup some iPhone images to another one.
 By Rico Rodriguez to iPhone Photos|Last updated on Sep 13, 2023
When you get a new iPhone, you're required to transfer pictures from old iPhone to the new one. On top of that, you also have the demand to selectively copy some iPhone images to another iPhone (friend's or family member's iPhone) for sharing. Actually, there are scads of ways to reach this purpose, among which iCloud and iTunes are officially recommended. However, still plenty of you iPhone users are reluctant to use iCloud or iTunes since iCloud storage space is quite limited and iTunes errors have been popping up during the whole process.
Any better solutions to sync iPhone photos to another one without iCloud/iTunes? Yes. Here we'd like to share with you the even better yet easier workarounds to transfer pictures from iPhone to iPhone with nary a trouble.
To move iPhone pictures from your old iPhone to newly-bought iPhone, there is a super quick way - Quick Start, being able to backup all the iPhone images to the new one without iCloud/iTunes/computer. How to make it happen? Read on:
1. Make sure that your iPhone is updated to iOS 17 or later. Only in this way can the new iPhone be automatically set up.
2. Both iPhones are needed to involve in this procedure. Free up your time when you don't need to use them for a couple of mins.
Step 1: Insert SIM Card into Your iPhone.
1. Put the new SIM card to your new iPhone.
2. Transfer the SIM card that previously exists in the old iPhone to the new iPhone.
3. Contact your mobile carrier if the current SIM card doesn't fit your new iPhone well or needs to be changed.
Step 2: Place Both iPhones Close Together.
1. Start your new iPhone and place it near your old iPhone running iOS 17 or later. The Quick Start screen shows up on your old device and pops up with the option of using your Apple ID to set up your new iPhone. Check if it's the Apple ID that you're disposed to use on both iPhones, afterwards click Continue. (Note: make sure the Bluetooth is enabled on your old iPhone, or the Continue icon doesn't appear thereon.).
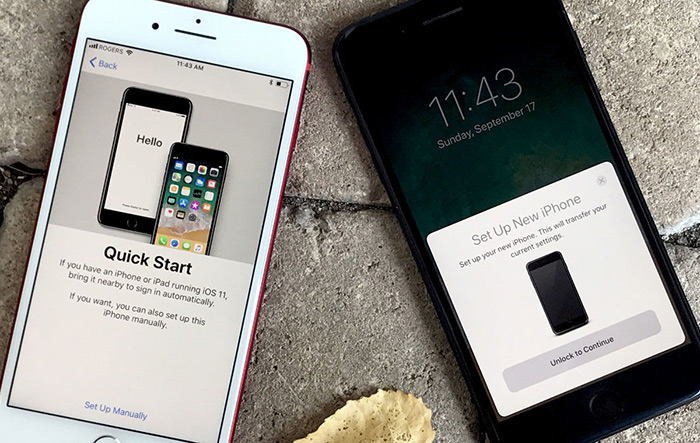
2. Don't do anything until an animation shows up on your new iDevice. Hold your old iPhone over the new one, then move the animation to the central place in the viewfinder, which is followed by a message with "Finish on New [iPhone]".
3. Enter the old iPhone's passcode on your new iPhone. And then Face ID or Touch ID is the next one to set up.
4. Enter your Apple ID password on your new iPhone. You're required to enter other devices' passwords if you have more than one device.
5. On your new iPhone, two options prompt: restoring data from your iCloud backup, updating old device's backup and then restoring. Both are great. Choose one grounded on your personal condition.
Step 3: Sync iPhone Photos to a New iPhone.
1. Keep both of your two iPhones close to each other during the previous apps, data, settings and passwords sync.
2. Make sure that your new iPhone Xs/Max/XR is in a place with Wi-Fi network and that your new device is charged with power after setup. This allows photos stored in iCloud to automatically download to your new iPhone.
To share some memorable photos from your iPhone to your friend's or family member's iPhone, you need a professional iPhone photo transfer software that is able to selectively transfer some pictures from iPhone to another one, instead of all the pictures. Thankfully, your demand is seen by Digiarty Software, who understands your requirements and develops MacX MediaTrans especially for you to sync iPhone photos to iPhone at your disposal: freely select photos > copy iPhone photos to Mac/PC > transfer to another iPhone on desktop.
Another great advanced tool found in MacX MediaTrans is the photo management feature, which makes an easy work for creating & organizing photo albums and bulk deleting photos/camera roll/albums just 1 click away. What's even better, if your receipt device doesn't natively support HEIC photo format, this program will automatically convert HEIC to JPG during the photo transfer process so as to smoothly playback on your iPhone without model/iOS version issue.


Free download this iPhone photo manager on your MacBook/MBP/iMac Pro or Windows PC. Then install and launch it on your desktop. Afterwards, connect your newly-bought iPhone to Macbook Pro/Air, iMac, Mac Mini or iMac Pro via USB cable. If it doesn't recognize your iPhone, change to another USB port or USB cable to try again.
Note: A prompt will appears once the connection succeeds, and you're advised to adjust iTunes settings in case of any data loss during the photo sync procedure. So please follow the prompts to set iTunes first.
Tap Photos icon at the main home > Choose pictures you need. Firstly, pick out photo album at the left side. The photos in your iPhone are well organized by different photo albums, including camera roll selfies, panoramas, bursts, screenshots, etc. Next, select pictures via time management: By Day, By Week, By Month or By Year under Group option. Thirdly, manually tick the photos you wanna sync.
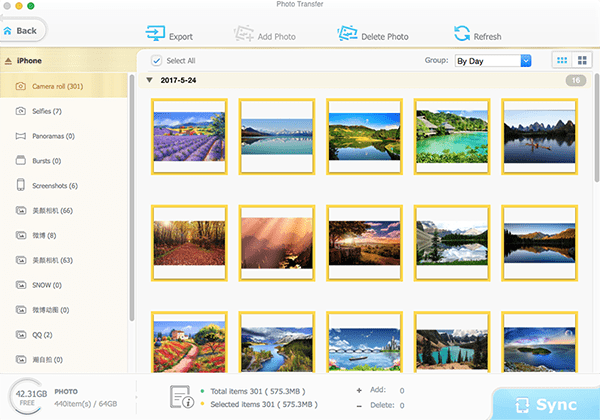
Press "Export" button after the image selection is done. And this software will begin to export iPhone pictures to your computer. You can bulk transfer as many hi-res photos (HDR/HDR live/still images) as you want without any limitations on quality and quantity.
As for the HEIC photos with high compression effeciency and poorer compatibility, you have two options provided by this program to deal with them:
1. For newer iPhones (iPhone 5s or later) as receipt device, high compression effeciency is what you concern about. So keep HEIC format without conversion.
2. For older iPhones (iPhone 5C or earlier) as receipt device, better compatibility is your top concern. Hence, choose to auto convert HEIC to JPG during image syncing.
Disconnect your old iPhone. Instead, connect your receipt iPhone with this iPhone photo manager software via USB cable. Similarly, click "Photo Transfer" > tap "Add Photo" option > choose the photos you just transferred to your desktop under Mac Video Library > hit "Done" > click "Sync" button and MacX's data sync engine goes into action to execute your command.


Digiarty Software, Inc. (MacXDVD) is a leader in delivering stable multimedia software applications for worldwide users since its establishment in 2006.
Home | About | Site Map | Privacy Policy | Terms and Conditions | License Agreement | Resource | News | Contact Us
Copyright © 2026 Digiarty Software, Inc (MacXDVD). All rights reserved
Apple, the Apple logo, Mac, iPhone, iPad, iPod and iTunes are trademarks of Apple Inc, registered in the U.S. and other countries.
Digiarty Software is not developed by or affiliated with Apple Inc.


