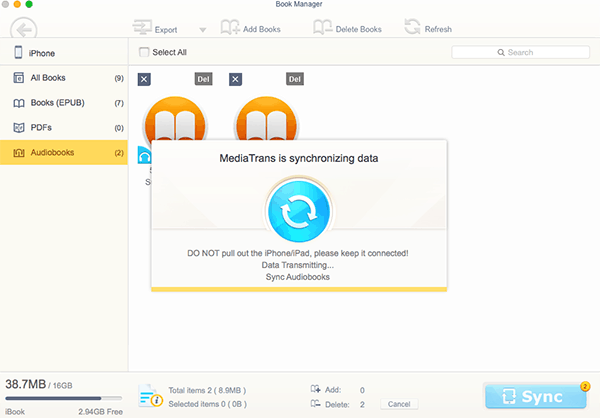
Wanna transfer audiobooks to iPhone without any trouble? Here's an easy way to transfer audiobook from Mac/Windows to iPhone etc. without the off-putting iTunes. Audiobooks of any formats size can be smoothly transferred to iPhone in just seconds, and worth noting that audiobooks in MP3/AAC/WMA etc. can be converted into MP3 and AAC without losing any audio quality. Dig up more details here.
You get freedom to listen to audiobooks at home, out exercising, on the plane or in any places you like after you move audiobook to iPhone. You can use iTunes to get the job done, which is the most commonly used way, but probably not the best consideration owing to the frequently reported iTunes errors, such as iTunes not syncing audiobook to iPhone, iPhone data loss etc. Here we introduce a lesser-known but easier and faster way to transfer audiobooks to iPhone without using iTunes. In addition, audiobooks of any format can be automatically converted into MP3 or AAC format.
The first-rated iPhone audiobook transfer tool recommended here is MacX MediaTrans, praised by Cult of Mac as the most reliable iTunes alternative. MacX MediaTrans is an all-around iPhone data transfer program and does more than merely audiobook to iPhone transferring. It can:
1. Speedily transfer audiobooks from Mac to iPhone without iTunes syncing in a click. (No data loss).
2. Remove DRM from iTunes M4P audiobooks and convert protected audiobook M4P to MP3, M4B to MP3, AAC.
3. Move audiobook from iPhone to Mac/PC as a backup or to free up iPhone space.
4. Work as an iPhone file manager and help manage audiobooks for iPhone efficiently.
5. Auto convert audiobooks to MP3, AAC format with audio quality untouched thanks to embedded high quality audiobook converter.
6. Transfer and manage other files, including music, videos, movies, photos, ringtones, voice memos, ebooks, to name a few.
Step 1: Download the iPhone audiobook transfer for Mac or for Windows, and run it. The iOS data transfer & manager software is updated constantly to support the latest macOS Big Sur and Win 10. Turn off iTunes Auto Sync in case of data loss. You'll be asked to plug-in iPhone/iPad, connect iPhone X or iPhone 8/8 Plus to Mac or PC with iDevice USB cable.
Step 2: Now, on the main interface, click Book. To copy audiobook to iPhone from Mac/PC, click Add Books on the top. Select audiobooks you want to transfer from Mac/PC to iPhone. Just click the audiobook displayed on the left pane and select audiobooks, click "Export" to move iPhone audiobook out to computer. This software will automatically remove any DRM protection from your audiobooks.
Declaration: your legal yet personal usage should be authorized by the audiobook's publisher. We don't advocate any piracy or illegal usage of right-protected audiobooks. Please abide by your country or local copyright protection law.
Tips: You can go to Settings > Options and select "Auto convet music format to" MP3 or AAC to auto convert audiobooks to MP3 or AAC during the audiobook to iPhone transferring process, needless of third party audiobook converter.
Step 3: Click "Sync", and selected audiobooks will be moved to iPhone in batch at high speed. You'll receive the "Completed" message after the audiobooks are transferred to iPhone successfully.

Note: It's quite the same to fast sync audiobooks to iPad, iPod, or transfer music from iPhone to Mac, video, movies, TV shows, ringtone, voice memos, photos, ebooks etc. media files between iPhone/iPad/iPod and computer without iTunes syncing. Since developers update the iOS file transfer frequently, some nice new features may not be mentioned here.
Most of you are sick of iTunes due to various causes. Yet, there are still some users who don't ditch away iTunes. If you're one of them, the below iTunes troubleshooting tips might be helpful in audiobook not syncing to iPhone error.
Solution 1: Go to Summary screen in iTunes > check if you tick "Sync only checked songs and videos" option. If you enable this option, disable it. Then relaunch your iTunes to try again.
Solution 2: Change your audio media kind to Audiobook within iTunes.
1). Import your audio files into iTunes, one audio file per chapter. Convert your audio files to AAC if they're encoded by other codecs.
2). Name the audio files so as to be organized correctly when it comes to use alphabetical order.
3). Choose all the audio files together and right click & select "Get Info". When the Get Info window pops up, head to "Details" > name them all with the same title (e.g., Inspiring Quotes from Wharton).
4). Switch to "Options" column > change the media kind to Audiobook. Now you would see that the new audio files are located under iBooks category and that they are labelled as audiobooks.
Solution 3: Change your audio media kind to Audiobook Using 3rd Party App.
1). Drag your audio files out of iTunes to a folder > get rid of tags with a third party app like Fission > re-load your files to iTunes.
2). Re-name your audio files, alongside with media kind and category ect. Then, check if your audio files are located under iBooks.
Home | About | Site Map | Privacy Policy | Terms and Conditions | License Agreement | Resource | News | Contact Us
Copyright © 2026 Digiarty Software, Inc (MacXDVD). All rights reserved
Apple, the Apple logo, Mac, iPhone, iPad, iPod and iTunes are trademarks of Apple Inc, registered in the U.S. and other countries.
Digiarty Software is not developed by or affiliated with Apple Inc.