What should you do when you get a "sync session failed to start" message on your iPhone? Try the methods you think of on your own or spend several hours on the possible workable solutions provided on the forums. Or instead, stay here for 2 minutes to read this comprehensive post with all potentially effective solutions covered for you to tackle this iTunes sync error.
 By Abby Poole to iTunes Troubleshooting Tips|Last updated on Jan.22, 2023
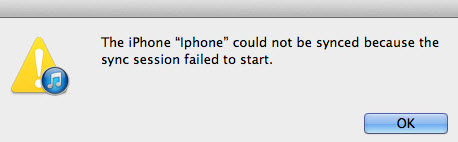
iTunes is disappointing. You might spend 50% of your luck to resolve the iTunes error "iTunes not recognizing iPhone". Then you're required to use up all your luck to troubleshoot the problem "the iPhone cannot be synced. An unknow error occurred [-54]". And when you think everything is eventually on the right track, the error of "the sync session could not be started on your iPhone" comes to you. What to do? Fix it. But this time, you have no luck. This iTunes error still remains unsolved after you give all your efforts.
There is always a silver lining in life. Here we gather all the effective solutions for you to fix "iTunes sync session failed to start" trouble with 99% success rate. Thus, you don't have to look around for other tips and tricks. Both time and energy are saved.
Restart your iTunes first, even though you might think it's a cliche. But it does work sometimes. So have a try. After all, you lose nothing. Of course, If it doesn't work, update your iTunes to the latest version.
The specific iTunes restart process would be slightly different from the ordinary one:
1). Stop iTunes > plug your iPhone into the USB port (you'd better use the USB port at the back of your computer host).
2). Start iTunes > If it starts automatically, stop it and restart it with iPhone that you plug into the USB port.
3). Now sync your iPhone with iTunes to try again.
We have used this method before to fix iTunes backup error "iTunes could not backup the iPhone because an error occurred". Check this article if you want to know the detailed operating steps to delete old iPhone backup in iTunes.
Since the iPhone sync involves with two parties, iTunes and iPhone, you can't just focus on iTunes. Maybe it's your iPhone to be blamed. In such case, give your iPhone a soft reset to have a try.
1). Force close all the apps running at the background on your iPhone.
2). Now do a soft reset on your iPhone.
For iPhone 7 or older iPhones with Home button: hold both Home and Sleep button for roughly 10 seconds. Don't release unless the Apple logo appears. Re-connect your iPhone to computer after it returns to home screen and then check if it can normally sync files.
For iPhone 8 or newer iPhones without Home button: press and quickly release the Volume up button > the same method is used for Volume down button > don't loosen the Side button until the Apple logo shows up on your iPhone 8 or higher device.
3). Run your iTunes, connect iPhone to desktop and try again.
Actually, we can't say this solution is 100% useful, for it comes from a user's personal experience. It indeed works for him, but it doesn't 100% come to rescue you from your trouble. So you just take this for reference if you have no other better ways to go.
1). Backup your iPhone photos to Mac or Windows if photos eat up your iPhone storage capability. You can use Photos app to backup your iPhone pictures to macOS or resort to top iTunes alternative MacX MediaTrans to bulk copy images from iPhone to Mac at Nvidia/Intel/AMD GPU hardware accelerated speed, 5 seconds to sync 100 4K images and to bulk delete unwanted images from iPhone.
2). If you don't move and delete photos from your iPhone, you can also use MacX MediaTrans to backup videos, movies, music songs, ringtones, iBooks, iTunes U, podcasts, iTunes purchases and more from iPhone to macOS for eternal storage and then bulk offload unnecessary data files to free up iPhone space to sync again.
Some users suggest you to have a try on the factory settings. Yet, to restore to factory settings, you need to make a backup of your iPhone at the first place. Since iTunes failed to sync your iPhone files currently, you can take its top replacement MacX MediaTrans into consideration, which allows you to bulk backup iPhone photos, videos, TV shows, music, iBooks, ringtones, iTunes purchases, etc. to MacBook/MBP/iMac/Mac Mini without the involvement of iTunes, nor the offputting iTunes errors. After the iPhone backup is completed, proceed to restore to factory settings:
1). Open iPhone > head to Settings > General > Reset > select "Erase All Content and Settings".
2). A warning box shows up after you type in your password. Followed by a top on the option of "Erase iPhone" in red.
3). Your Apple ID password is needed to confirm the action. Afterwards, your iPhone will clean up everything off its storage and go back to its factory settings.
4). Set up your iPhone as a new phone and connect it to iTunes to tackle "the iPhone could not be synced because the sync session failed to start" error.
If, unfortunately, the above mentioned methods still don't work for you, there is still one way to break the impasse - iTunes alternative
MacX MediaTrans. It can do what iTunes does and do what iTunes can't do:
1). World's No.1 fast speed to bulk sync and backup almost everything from iPhone to macOS/Windows, be it video, picture, music...
2). The whole iPhone files backup process doesn't require iTunes involvement. So it's free from maddening iTunes errors.
3). iTunes supports unidirectional transfer (Mac to iPhone) while MacX gives you bi-directional solution (iPhone to Mac and vice versa).
4). An even better iPhone manager than iTunes: create/delete playlist or songs, edit music info, convert M4V to MP4, M4P to MP3...


How to sync iPhone files to macOS without "sync session failed to start" error? Read the below instance with music sync:
Step 1: At the very beginning, this iTunes replacement program needs iTunes to detect and scan your iPhone. Make sure your iTunes is the latest version. Then launch iTunes and tap "iTunes" > "Preferences…" > tap "Devices" and tick the option "Prevent iPods, iPhones, and iPads from syncing automatically." Do as it tells you since it aims to protect your iPhone file data from getting accidently lost during file syncing.
Step 2: Connect your iPhone to MacBook/MBP/iMac via USB cable and run the best iTunes alternative on your desktop. The latest iPhone Xs Max, iPhone Xs, iPhone XR and all theiOS 17 iPhones are supported.
Note: if your iPhone isn't instantly recognized by your computer, please change a USB cable or USB port to have a try.
Step 3: Hit "Music Manager" on the home screen > choose the music album at the left panel > opt for the music songs, ringtones, MP3, audio files from your music album or just tick "Select All".

Step 4: The "Edit" feature is accessible for you to edit music information before music sync. If you have this need, choose the music song > tap "Edit" at the latter place of the music info bar to add music singer, composer, album name, release date, etc.
Step 5: Hit "Sync" button and then these music files will be instantly synced to from your iPhone to macOS without any iTunes errors. You don't need to worry about your iTunes purchased protected music files (M4P), for they can be successfully transferred to macOS and playback thereon. This should give the credits to MacX MediaTrans' auto video/audio conversion feature, which can wipe protection tech from iTunes purchases, as well as auto convert M4P to MP3 for limitless & legal playback on your desktop.
Wonder how to decrypt protected music audio? Check this post >>>

Digiarty Software, Inc. (MacXDVD) is a leader in delivering stable multimedia software applications for worldwide users since its establishment in 2006.
Home | About | Site Map | Privacy Policy | Terms and Conditions | License Agreement | Resource | News | Contact Us
Copyright © 2026 Digiarty Software, Inc (MacXDVD). All rights reserved
Apple, the Apple logo, Mac, iPhone, iPad, iPod and iTunes are trademarks of Apple Inc, registered in the U.S. and other countries.
Digiarty Software is not developed by or affiliated with Apple Inc.