Home > Online Video > Streaming Video > Upload Video to YouTube on Mac


Home > Online Video > Streaming Video > Upload Video to YouTube on Mac
To upload video to YouTube Mac is an frequent option. YouTube is one of the most popular video sharing sites and has become the go-to site where you can enjoy the funniest, strangest and best videos nowadays. Every second there is one hour of video being published. If you have any video you want to share with the whole world, YouTube is the first port of call. For those who are novice for YouTube, just follow the following suggestions on how to upload video to YouTube on Mac with a easy and fast YouTube posting tool for mac. As long as you get the hang of it, you will know how easy it is and enjoy the fun.
For convenience sake, let's have a look at the best settings for YouTube video upload on Mac before go to the next step:
1. YouTube acceptable formats: FLV, WMV, MPEG4, MOV, AVI and MPEG.
2. Video length: shorter 15 minutes.
3. Video size: smaller than 2GB.
4. Video resolution: 640x360 (16:9) or 480x360 (4:3) recommended.
Tips: How to post a video on YouTube on Mac if your video is not accepted due to format incompatibility, like MKV, MTS etc? Turn to a proper Video Converter for Mac to convert the videos to YouTube supported video format.

To solve how to upload videos to YouTube issue, you must make sure your videos is accepted by YouTube. Macxvideo AI can precisely convert your recording HD videos to YouTube supported formats, codec, size etc.

Case 1: How to Publish A YouTube Video on Mac from the Existing Video Library on Mac
In case you have stored tons of movies or videos on Mac and want to upload them to YouTube to share with your family, friends or even strangers, check if the movie or video is less than 2GB in size and shorter than 15 minutes in length and compliant in formats. If those requirements are satisfied, just open your YouTube account and start to share, otherwise, you may need a YouTube uploader for Mac to help you convert the movies or videos to the best YouTube supported video formats to avoid headache.
Case 2: Send HD Videos to YouTube from HD Camera
Come back from a trip, an amazing wedding, an interesting party or a great show, you may want to transfer the memorable or funny HD videos recoded by HD digital cameras like Panasonic, Cannon and Sony to YouTube. But to add video to YouTube Mac in HD is not easy. As the native video files of the most HD/UHD camcorders comes in M2TS, AVCHD, MKV and the like which are not in the list of YouTube supported video formats on one hand, with the HD video size larger than it is allowed on YouTube on the other hand, you may get error messages when upload camera HD videos to YouTube, which enforces you to convert MKV to MP4, AVCHD to AVI, MOV, FLV and other formats supported by YouTube.
Case 3: How to post An iMovie to YouTube
YouTube allows personal edited videos from video editing programs like Apple's iMovie. Since the emergence of iMovie, users have the ability to directly share iMovies video from Mac to YouTube after they add subtitles to iMovie or resize videos with iMovie. Those iMovie clips can be shared million times on YouTube by visitors all over the world in just a few minutes. If the iMovie videos are accepted by YouTube, you can just go to the main menu and upload iMovie to YouTube directly. However, sometimes you may get iMovie failed. If you unfortunately find iMovie not posting to YouTube, for which there are various reasons like video format, video size etc, then you need to convert the videos to YouTube supported formats and size.
Case 4: Add Recorded Screen or Game Videos to YouTube
Something that many people like to do is make screen or game video recordings with some screen video recorder and send the recorded game walkthrough or tutorial to YouTube for sharing. However, more often than not, you spend much time and efforts creating the recorded videos, only to find they are not accepted by YouTube. For making compatible videos on Mac , you will also need a proper video converter to convert the videos to YouTube acceptable formats.
To solve all the problems aforementioned once for all, a solid yet multipurpose YouTube uploader for Mac is essential. Fortunately, here is a software named Macxvideo AI which works like a charm in all the above cases. Wherever the video comes from or is stored in including SD cards or camera scroll or whatever formats those videos are, this video to YouTube converter can assist you to get the videos ready for uploading to YouTube. You can convert scads of HD and SD videos, like AVCHD to MP4, MKV to FLV, MTS to AVI, WMV to MOV and more at fast speed and with high quality reserved. After the video is ready-acceptable for YouTube, the problem of how to post a video on YouTube will be easily solved.


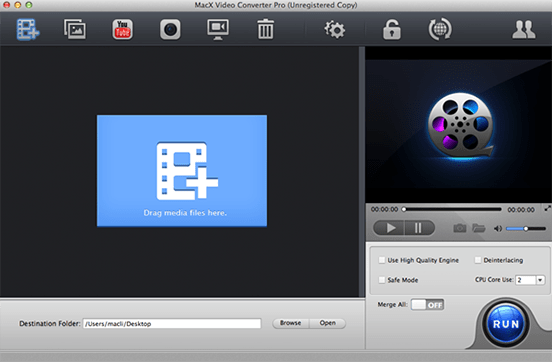
Download and launch the YouTube uploader for Mac, load the video you'd like to publish by hitting "Add File" button.
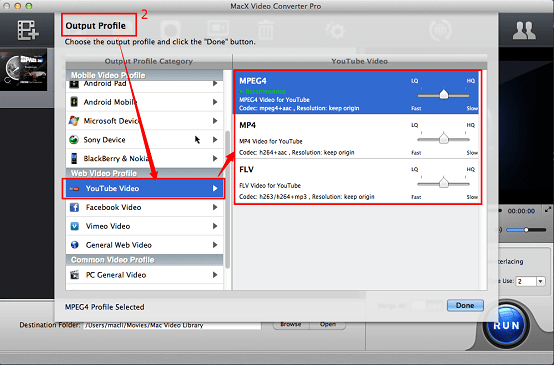
Select the target format "to YouTube Video" and choose one format from the list "to FLV/MP4/MPEG4".
Tips: You can use this program to trim, crop YouTube video, add watermark and external subtitle to the video, and customize the video quality by tweaking video/audio parameters in accordance with your personal demands.
Specify an output folder on your computer to save the output files. Click "Browse" button to choose the path where you want to save the output files in.
After finishing the above steps, click the "RUN" button to start converting video to YouTube on Mac, you could view the conversion progress and are able to cancel the converting process at anytime.
After converting video to YouTube on Mac, you can start to post MP4 to YouTube, MKV, AVCHD, MTS to YouTube or even publish HEVC to YouTube on Mac now. Open your YouTube account and follow the steps as usual.
 Author: Bertha Miller | Updated on May 23, 2025
Here's guide on how to upload 360 video to YouTube without losing quality, including preparation, step-by-step upload tutorial, common YouTube HD 360 VR video upload issues & troubleshootings.
You gotta know the first step is to compress & convert MOV QuickTime video to YouTube MP4, FLV or WMV before you go to upload QuickTime to YouTube. And more importanly, reduce quicktime file size to remove the unwanted part of QuickTime files for faster upload to YouTube.
How to upload video to Instagram from computer, YouTube, internet or link? Guide on Instagram video upload in HD/UHD from PC/Mac desktop, YouTube/web, iPhone Android without losing quality is shared here.

Macxvideo AI is a feature-rich, high quality, and incredibly fast video game recorder for Mac. It's an all-in-one video converting solution with top quality, easiness, fast speed and high-efficiency.

 Convert Your Video to YouTube Video Uploading Specs